![=MR-C=KinG[GER]](/data/avatars/m/65/65819.jpg?1586942393)
=MR-C=KinG[GER]
Volt-Modder(in)
Das Problem dürfte sein, dass die Kanone EWIG lang zum einzielen braucht.
Ich habe den ELC mit der Topgun, ich bin schlimmes gewöhnt


Das Problem dürfte sein, dass die Kanone EWIG lang zum einzielen braucht.


Am Turm gibts Frontal zwei Stellen: Links und Rechts unten in den Ecken, direkt im Anschluss an die Kanonenblende.Keine Lust^^
Hab letztens aus relativer Nähe bestimmt 15-mal versucht den irgendwie zu penetrieren und bin weder an Seiten,Turm oder Front durchgeschlagen-Als ich dessen Panzerung dann gesehen habe hat es mich halt leicht stutzig gemacht...
Ich hab auch das Gefühl das der SP die 170 Pen nur sehr selten erreicht.


Den ARL44 finde ich recht interessant.

Den Tiger musst du auf ca. 30-40° anwinken, dann gehts eigentlich. Ich bin nun beim E-75 und habe trotzdem den Tiger immer noch, fährt sich eigentlich ganz gut


Die Midtier fallen mir nur selten als ernsthafte Gegner auf, die High-Tier sind tödlich, wenn der Fahrer mit ungepanzerten, mobilen DPM-Schleudern umgehen kann.
Wie bei allen Panzern dieser Art (Franz Meds, der neue Ami-Ast) gilt aber:
99% können es nicht. Und im Gegensatz zu normalen Heavys liegen hier Welten zwische können und nicht können. Wenn die Noobs auch noch eine passive Spielweise haben oder ihre Trommel ausschöpfen wollen, ist so ein AMX60 nur noch ein willkommener Oneshot für die Arty.
Gold lässt sich nicht rechtfertigen, vor allem nicht wenn man seinen T5 mit T6 gruppiert und sich dann über fehlenden Durchschlag wundert.Hihihi. Ja, ich weiß Goldnoob, aber es war einfach Spielentscheidend, weil ich 3 Achter decapped halten musste.^^
Da scheint etwas dran zu sein.aus Wot-Wiki schrieb:Churchill III
Pros:
...
Generates a high level of EXP, which speeds crew training
...
joa, und der m4 war einfach top. ich hab den echt geliebt und fands schwer mich für dieses revolver kack ding davon zu trennen ^^ der 50 100 is für mich sehr zwiespältig. oft treff ich von nem mag auch auf nächste nähe nur 3 oder 4 schuss und dmg machen höchstens 3. auf distanz hat man keinerlei vorteil vom revolver, da man ewig einzielt - und auch dann die hälfte in den sand setzt - und im nahkampf ist er selten gut einsetzbar. man braucht nen relativ allein stehenden gegner der am besten auch noch abgelenkt ist - und das hat man leider nich sehr oft.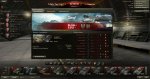
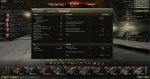
 29tes Gefecht direkt von "II Klasse".

/**
* Full configuration file (hereinafter - the configuration) with all possible options,
* default configuration.
*
* Attention! You must NOT use the percent symbol in this file.
* Instead, the percent symbol should be written: \u0025
*/
{
"configVersion": "1.5.0", // Version of the config. Do not remove or change it unnecessarily.
"editorVersion": "0.36", // Version of the editor.
// Common config options. All settings information in the mod not being used.
"definition": {
"author": "sirmax2", // Config author
"description": "Default settings for XVM", // Config description
"url": "http://code.google.com/p/wot-xvm/", // Address to config updates
"date": "12.10.2012", // Config last modified
"gameVersion": "0.8.4", // Supported version of the game
"modMinVersion": "3.4.0" // The minimum required version of the XVM mod
},
// General parameters for the battle interface
"battle": {
"mirroredVehicleIcons": true, // false - Disable tank icon mirroring (good for alternative icons). True by default.
"showPostmortemTips": true, // false - Disable pop-up panel at the bottom after death. True by default.
"removePanelsModeSwitcher": false, // true - Remove the Players Panel mode switcher (buttons for changing size)
"highlightVehicleIcon": true, // false - disable highlighting of selected vehicle icon and squad
"clockFormat": "H:N", // Show the clock on the Debug Panel (near FPS). Format: Y:year, M:month, D:day, H:hour, N:minutes, S:seconds. "" - remove clock.
"useStandardMarkers": false, // true - use standard client vehicle markers
"clanIconsFolder": "../../../clanicons" // path to clan icons folder relative to res_mods/[GAME VERSION]/gui/flash
},
// Options for player statistics (only with xvm-stat)
"rating": {
"showPlayersStatistics": true, // true - Toggle player statistics on/off. Global setting - without the statistics module, this is always disabled
"loadEnemyStatsInFogOfWar": true, // true - Enable downloading of data on opponents in the "fog of war"
"enableStatisticsLog": false // true - Enable saving statistics to "xvm-stat.log" file
},
// Parameters of the Battle Loading Screen
"battleLoading": {
"clockFormat": "H:N:S", // Show the clock on the Battle Loading Screen. Format: Y:year, M:month, D:day, H:hour, N:minutes, S:seconds. "" - remove clock.
"showChances": true, // true – Enable display of "chance to win" (only with xvm-stat) Read more: [url]http://www.koreanrandom.com/forum/topic/1642-chance[/url]
"showChancesExp": true, // Show experimental "chance to win" formula
"removeSquadIcon": false, // true – Disable Platoon icons. This blank space can house, for example, clan logos
"clanIcon": { // Display options for Team/Clan logos
"show": true, // false – Disable Team/Clan logos in Battle Loading Screen
"x": 0, // Position on the X axis, relative to the vehicle icon
"y": 6, // Position on the Y axis, relative to the vehicle icon
"xr": 0, // Position on the X axis for right side (positive values run to the *inside* of the table)
"yr": 6, // Position on the Y axis for right side
"w": 16, // Width of the Team/Clan logo
"h": 16, // Height of the Team/Clan logo
"alpha": 90 // Transparency of the Team/Clan logo
},
// Display format for the left Players Panel (macros allowed, see readme-en.txt)
"formatLeft": "{{vehicle}} <font color='{{c:kb}}'>{{kb:3}}</font> <font color='{{c:eff}}'>{{eff}}</font> <font color='{{c:rating}}'>{{rating}}</font>",
// Display format for the right Players Panel (macros allowed, see readme-en.txt)
"formatRight": "<font color='{{c:rating}}'>{{rating}}</font> <font color='{{c:eff}}'>{{eff}}</font> <font color='{{c:kb}}'>{{kb:3}}</font> {{vehicle}}"
},
// Parameters of the Battle Statistics Form
"statisticForm": {
"showChances": true, // true - Enable display of "chance to win" (only with xvm-stat).
"showChancesExp": true, // Show experimental "chance to win" formula
"removeSquadIcon": false, // true - Disable Platoon icons. This blank space can house, for example, clan logos.
// Display options for Team/Clan logos (see battleLoading above)
"clanIcon": { "show": true, "x": 0, "y": 6, "xr": 0, "yr": 6, "h": 16, "w": 16, "alpha": 90 },
// Display format for the left column (macros allowed, see readme-en.txt)
"formatLeft": "{{vehicle}} <font color='{{c:kb}}'>{{kb:3}}</font> <font color='{{c:eff}}'>{{eff}}</font> <font color='{{c:rating}}'>{{rating}}</font>",
// Display format for the right column (macros allowed, see readme-en.txt)
"formatRight": "<font color='{{c:rating}}'>{{rating}}</font> <font color='{{c:eff}}'>{{eff}}</font> <font color='{{c:kb}}'>{{kb:3}}</font> {{vehicle}}"
},
// Parameters of the Players Panels
"playersPanel": {
"alpha": 60, // Opacity percentage of the panels. (0 – transparent ... 100 – opaque)
"iconAlpha": 100, // Opacity percentage of icons in the panels. (0 – transparent ... 100 – opaque)
"removeSquadIcon": false, // true - Disable Platoon icons.
// Display options for Team/Clan logos (see battleLoading above).
"clanIcon": { "show": true, "x": 0, "y": 6, "xr": 0, "yr": 6, "h": 16, "w": 16, "alpha": 90 },
// Options for the "medium" panels - the first of the medium panels
"medium": {
"width": 46, // 0..250 - Width of the player's name column. Default is 46.
// Display format for the left panel (macros allowed, see readme-en.txt)
"formatLeft": "<font color='{{c:eff}}'>{{nick}}</font>",
// Display format for the right panel (macros allowed, see readme-en.txt)
"formatRight": "<font color='{{c:eff}}'>{{nick}}</font>"
},
// Options for the "medium2" panels - the second of the medium panels
"medium2": {
"width": 65, // 0..250 - Width of the player's name column. Default is 65.
// Display format for the left panel (macros allowed, see readme-en.txt)
"formatLeft": "<font color='{{c:eff}}'>{{vehicle}}</font>",
// Display format for the right panel (macros allowed, see readme-en.txt)
"formatRight": "<font color='{{c:eff}}'>{{vehicle}}</font>"
},
// Options for the "large" panels - the widest panels
"large": {
"width": 170, // 0..250 - Width of the player's name column. Default is 170.
// Display format for player nickname (macros allowed, see readme-en.txt)
"nickFormatLeft": "<font color='{{c:rating}}'>{{rating}}</font> {{nick}}",
"nickFormatRight": "{{nick}} <font color='{{c:rating}}'>{{rating}}</font>",
// Display format for vehicle name (macros allowed, see readme-en.txt)
"vehicleFormatLeft": "<font color='{{c:eff}}'>{{vehicle}}</font>",
"vehicleFormatRight": "<font color='{{c:eff}}'>{{vehicle}}</font>"
}
},
// {{turret}} marker display strings
"turretMarkers": {
"highVulnerability": "*", // Subject has stock turret and top gun can not be mounted. Subject is highly vulnerable.
"lowVulnerability": "'" // Subject has stock turret and top gun can be mounted. Subject is somewhat vulnerable.
},
// Hit log (my hits calculator)
"hitLog": {
"enabled": true, // on/off switch
"x": 270, // X position (negative values - bind to right side of screen)
"y": 5, // Y position (negative values - bind to bottom side of screen)
"w": 500, // Width
"h": 1000, // Height
"lines": 0, // Number of lines. Old lines will be pushed out
"direction": "down", // Log direction: up - lines will be added from up to down, down - from down to up.
"insertOrder": "end", // Insert order: begin - insert new values to begin, end - add to end
"groupHitsByPlayer": true, // group hits by players name
// Substitution for {{dead}} macro when tank is dead
"deadMarker": "<font face='Wingdings'>N</font>",
"blowupMarker": "<font face='Wingdings'>M</font>",
// Hits header format, including last hit (macros allowed, see readme-en.txt)
"formatHeader": "<font color='#FFFFFF'>Hits:</font> <font size='13'>#{{n}}</font> <font size='0{{vehicle}}'><b>{{dmg-total}}</b> <font color='#FFFFFF'>Last:</font> <font color='{{c:dmg-kind}}'><b>{{dmg}}</b> {{dead}}</font></font>",
// List of hits format (macros allowed, see readme-en.txt)
"formatHistory": "<textformat leading='-4' tabstops='[20,50,90,150]'><font size='12'>\u00D7{{n-player}}:</font><tab>{{dmg-player}}<tab>| <font color='{{c:dmg-kind}}'>{{dmg}}</font><tab>| <font color='{{c:dmg-kind}}'>{{dmg-kind}}</font><tab>| <font color='{{c:vtype}}'>{{vehicle}} {{dead}}</font></textformat>",
"shadow": { // Shadow options
"alpha": 100, // Opacity
"color": "0x000000", // Color
"angle": 45, // Offset angle
"distance": 0, // Offset distance
"size": 5, // Size
"strength": 150 // Intensity
}
},
// Capture bar
"captureBar": {
"enabled": true, // On/off switch
"primaryTitleOffset": 7, // Upper textfield offset in case of big font size
"appendPlus" : true, // append plus to three capturers. Cant calculate more than three.
// Capture format (macros allowed, see readme-en.txt)
"enemy": {
"primaryTitleFormat": "<font size='16' color='#000000'>Enemy base capture! {{extra}}</font>", // Upper textfield
"secondaryTitleFormat": "<font size='16' color='#000000'>{{points}}</font>", // Lower textfield
"captureDoneFormat": "<font size='16' color='#000000'>Enemy base captured!</font>", // Full capture text
"extra": "Capturers: <b>{{tanks}}</b> Timeleft: <b>{{time}}<b>", // Extra text available after necessary calculations
"shadow": { // Fields shadow
"color": "0xEEEEEE", // Color
"alpha": 75, // Alpha 0-100
"blur": 15, // Blur 0-255
"strength": 3 // Strength 0-255
}
},
"ally": {
"primaryTitleFormat": "<font size='16' color='#000000'>Ally base capture! {{extra}}</font>", // Upper textfield
"secondaryTitleFormat": "<font size='16' color='#000000'>{{points}}</font>", // Lower textfield
"captureDoneFormat": "<font size='16' color='#000000'>Ally base captured!</font>", // Full capture text
"extra": "Capturers: <b>{{tanks}}</b> Timeleft: <b>{{time}}<b>", // Extra text available after necessary calculations
"shadow": { // Fields shadow
"color": "0xEEEEEE", // Color
"alpha": 75, // Alpha 0-100
"blur": 15, // Blur 0-255
"strength": 3 // Strength 0-255
}
}
},
////////////////////////////////////////////////////////////////////////////////////////////////////////////////////////////////////////////
// Minimap //
////////////////////////////////////////////////////////////////////////////////////////////////////////////////////////////////////////////
"minimap": {
// Hint: minimap size can be changed by "-" and "=" keyboard buttons.
// Fields can load images from disk by HTML:
// "format": { "ally": "<img src='img://../icons/bzz.png' width='8' height='8'>"}, ...
// While file is at WoT\res_mods\icons\bzz.png
// On\off minimap mod switch as a whole.
// Turned off by default.
"enabled": true, // Enabling/disabling the entire fashion minimap as a whole.
"mapBackgroundImageAlpha": 100, // The transparency of the map image.
"selfIconAlpha": 100, //transparency of its icons. White arrow
"cameraAlpha": 100, // Camera transparency and its attached geometry. Green triangle.
"iconScale": 0.8, //size of all markers.
"labels": { //text box Supports HTML.
"nickShrink": 4, //Maximum size of the nickname for the macro {{short-nick}}.
"units": { // Text labels for tanks on the minimap.
"revealedEnabled": true, // Incremental switch text boxes for the visible units
"lostEnemyEnabled": true, // Textfields switch for lost enemy units. Show last seen position.
"format": { // field format.
"ally": "<span class='mm_a'>{{vehicle-type}}</span>",
"enemy": "<span class='mm_e'>{{vehicle-type}}</span>",
"squad": "<span class='mm_s'><i>{{short-nick}}</i></span>", // Squad marker
"lost": "<textformat leading='-6'><span class='mm_l'>{{vehicle-class}}\n<textformat leading='-6'><span class='mm_l'><i>{{vehicle-type}}</i></span></font></textformat>\n</textformat>",
"oneself": "<b>{{level}}</b>" // Marker for when after you die."light":
},
"css": { // CSS style.
"ally": ".mm_a{font-family:$FieldFont; font-size:7px; color:#FFFFFF;}", //white color
"enemy": ".mm_e{font-family:$FieldFont; font-size:7px; color:#EEBBBB;}", //light pink
"squad": ".mm_s{font-family:$FieldFont; font-size:7px; color:#FF9933;}", // yellow
"Lost": ".mm_l{font-family:$FieldFont; font-size:6px; color:#FFFFFF;}.Mm_lclass{font-family:Arial; font-size:13px; color:#CCCCCC;}",
"oneself": ".mm_o{font-family:$FieldFont; font-size:6px; color:#FFFFFF;}"
},
"shadow": {
"ally": {
"enabled": true,
"color": "0x000000",
"distance": 0,
"angle": 0,
"alpha": 70,
"blur": 2,
"strength": 6
},
"enemy": {
"enabled": true,
"color": "0x000000", //black
"distance": 0,
"angle": 0,
"alpha": 70,
"blur": 2,
"strength": 5
},
"squad": {
"enabled": true,
"color": "0x000000", // black
"distance": 0,
"angle": 0,
"alpha": 70,
"blur": 2,
"strength": 5
},
"lost": {
"enabled": true,
"color": "0x000000", //black
"distance": 0,
"angle": 0,
"alpha": 70,
"blur": 2,
"strength": 6
},
"oneself": {
"enabled": true,
"color": "0xFFFFFF",
"distance": 0,
"angle": 0,
"alpha": 40,
"blur": 8,
"strength": 4
}
},
"offset": {
"ally": {"x": -11, "y": -2}, // Field offset relative to the current icons.
"enemy": {"x": -8, "y": -2}, // removing fields from the current icons.
"squad": {"x": -10, "y": -2}, // Field offset relative to the current icons.
"lost": {"x": -6, "y": -6}, // The offset of the last visible item coordinates -x moves to left -Y moves down
"oneself": {"x": 0, "y": 0} // Field offset relative to the current icons.
},
"alpha" : {
"ally": 100,
"enemy": 100,
"squad": 100,
"lost": 80,
"oneself": 100
}
},
"mapSize": { // The size of the map. For example 1000m, 700 m, 600 m.
"enabled": true,
"format": "<b>{{cellsize}}0 m</b>",
"css": "font-size:11px; color:#FFFFFF;",
"alpha": 75,
"offsetX": 0,
"offsetY": 0,
"shadow": { // Тень.
"enabled": true,
"color": "0xAAAAAA", //gray
"distance": 0,
"angle": 0,
"alpha": 0,
"blur": 0,
"strength": 3
},
// Decrease sizes in case of map image weird shrinking while map resize.
// Increase sizes in case of field being partially cut off.
"width": 100, // Reduce the dimensions when resizing the minimap image maps is compressed.
"height": 30 // Increase the dimensions, if the soderžmioe field is truncated.
}
},
"circles": {
"enabled": true,
"major": [
{ "enabled": true, "distance": 445, "thickness": 0.6, "alpha": 50, "color": "0xFF6600" }, // 445 max disclosure distance
{ "enabled": false, "distance": 500, "thickness": 0.6, "alpha": 50, "color": "0xFF0000" },
{ "enabled": true, "distance": 600, "thickness": 0.6, "alpha": 40, "color": "0x3366FF" },
{ "enabled": true, "distance": 50, "thickness": 0.6, "alpha": 50, "color": "0xFFFFFF" }
],
// Special circles dependent on vehicle type.
// Many configuration lines for the same vehicle make many circles.
// Only artillery top gun range by default.
// See other vehicle types at:
// [url]http://code.google.com/p/wot-xvm/source/browse/trunk/src/xvm/src/wot/utils/VehicleInfoData2.as[/url]
// Artillery gun fire range may differ depending on vehicle angle relative to ground
// and vehicle height positioning relative to target.
// See pics at [url=http://goo.gl/ZqlPa][[/url]
// Artillery range circle by type. Top gun range is used by default.
"special": [
// Copy lines in case many special circles for one type.
// level 1
{ "ms_1": { "enabled": true, "distance": 240, "thickness": 1, "alpha": 30, "color": "0xF50800" } }, // "MS-1" МS-1
{ "ms_1": { "enabled": true, "distance": 280, "thickness": 1, "alpha": 60, "color": "0x7FDC00" } }, // "MS-1" МS-1
{ "ltraktor": { "enabled": true, "distance": 260, "thickness": 1, "alpha": 30, "color": "0xF50800" } }, // "Ltraktor"
{ "ltraktor": { "enabled": true, "distance": 310, "thickness": 1, "alpha": 60, "color": "0x7FDC00" } }, // "Ltraktor" Verbesserter Turm
{ "t1_cunningham": { "enabled": true, "distance": 240, "thickness": 1, "alpha": 30, "color": "0xF50800" } }, // "T1_Cunningham" Cunningham D1
{ "t1_cunningham": { "enabled": true, "distance": 280, "thickness": 1, "alpha": 60, "color": "0x7FDC00" } }, // "T1_Cunningham" Cunningham D2
{ "renaultft": { "enabled": true, "distance": 250, "thickness": 1, "alpha": 30, "color": "0xF50800" } }, // "RenaultFT" RenaultFT La tour 1
{ "renaultft": { "enabled": true, "distance": 280, "thickness": 1, "alpha": 60, "color": "0x7FDC00" } }, // "RenaultFT" RenaultFT La tour 2
{ "ch06_renault_nc31": { "enabled": true, "distance": 250, "thickness": 1, "alpha": 30, "color": "0xF50800" } }, // "Ch06_Renault_NC31" FT-17
{ "ch06_renault_nc31": { "enabled": true, "distance": 280, "thickness": 1, "alpha": 60, "color": "0x7FDC00" } }, // "Ch06_Renault_NC31" FT-18
{ "gb01_medium_mark_i": { "enabled": true, "distance": 260, "thickness": 1, "alpha": 30, "color": "0xF50800" } }, // "GB01_Medium_Mark_I" Vickers Medium Mk. I
{ "gb01_medium_mark_i": { "enabled": true, "distance": 280, "thickness": 1, "alpha": 60, "color": "0x7FDC00" } }, // "GB01_Medium_Mark_I" Vickers Medium Mk. IA*
// level 2
{ "bt_2": { "enabled": true, "distance": 240, "thickness": 1, "alpha": 30, "color": "0xF50800" } }, // "BT-2" Christie
{ "bt_2": { "enabled": true, "distance": 280, "thickness": 1, "alpha": 60, "color": "0x7FDC00" } }, // "BT-2" БТ-2
{ "t_26": { "enabled": true, "distance": 280, "thickness": 1, "alpha": 30, "color": "0xF50800" } }, // "T-26" Т-26
{ "t_26": { "enabled": true, "distance": 310, "thickness": 1, "alpha": 60, "color": "0x7FDC00" } }, // "T-26" Т-26
{ "tetrarch_ll": { "enabled": true, "distance": 260, "thickness": 1, "alpha": 60, "color": "0x7FDC00" } }, // "Tetrarch_LL" Tetrarch
{ "h39_captured": { "enabled": true, "distance": 330, "thickness": 1, "alpha": 60, "color": "0x7FDC00" } }, // "H39_captured" "PzKpfw 38H735 (f)" 38H735-(f)-Turm
{ "pz35t": { "enabled": true, "distance": 290, "thickness": 1, "alpha": 30, "color": "0xF50800" } }, // "Pz35t" PzKpfw-35-(t)-Standardturm
{ "pz35t": { "enabled": true, "distance": 320, "thickness": 1, "alpha": 60, "color": "0x7FDC00" } }, // "Pz35t" PzKpfw-35-(t)-Verstärkterturm
{ "pzii": { "enabled": true, "distance": 290, "thickness": 1, "alpha": 30, "color": "0xF50800" } }, // "PzII" PzKpfw-II-Turm Ausf. B
{ "pzii": { "enabled": true, "distance": 320, "thickness": 1, "alpha": 60, "color": "0x7FDC00" } }, // "PzII" PzKpfw-II-Turm Ausf. F
{ "m2_lt": { "enabled": true, "distance": 260, "thickness": 1, "alpha": 30, "color": "0xF50800" } }, // "M2_lt" M2D27810
{ "m2_lt": { "enabled": true, "distance": 320, "thickness": 1, "alpha": 60, "color": "0x7FDC00" } }, // "M2_lt" M2D27812
{ "t1_e6": { "enabled": true, "distance": 260, "thickness": 1, "alpha": 60, "color": "0x7FDC00" } }, // "T1_E6" T1
{ "t2_lt": { "enabled": true, "distance": 260, "thickness": 1, "alpha": 60, "color": "0x7FDC00" } }, // "T2_lt" T2D1
{ "d1": { "enabled": true, "distance": 280, "thickness": 1, "alpha": 30, "color": "0xF50800" } }, // "D1" D1a
{ "d1": { "enabled": true, "distance": 300, "thickness": 1, "alpha": 60, "color": "0x7FDC00" } }, // "D1" D1b
{ "hotchkiss_h35": { "enabled": true, "distance": 300, "thickness": 1, "alpha": 60, "color": "0x7FDC00" } }, // "Hotchkiss_H35" APX-R
{ "gb03_cruiser_mk_i": { "enabled": true, "distance": 300, "thickness": 1, "alpha": 30, "color": "0xF50800" } }, // "GB03_Cruiser_Mk_I" Cruiser Mk. I
{ "gb03_cruiser_mk_i": { "enabled": true, "distance": 320, "thickness": 1, "alpha": 60, "color": "0x7FDC00" } }, // "GB03_Cruiser_Mk_I" Cruiser Mk. III
{ "gb58_cruiser_mk_iii": { "enabled": true, "distance": 320, "thickness": 1, "alpha": 30, "color": "0xF50800" } }, // "GB58_Cruiser_Mk_III" Cruiser Mk. III
{ "gb58_cruiser_mk_iii": { "enabled": true, "distance": 320, "thickness": 1, "alpha": 60, "color": "0x7FDC00" } }, // "GB58_Cruiser_Mk_III" Cruiser Mk. III*
{ "ch07_vickers_mke_type_bt26": { "enabled": true, "distance": 280, "thickness": 1, "alpha": 30, "color": "0xF50800" } }, // "Ch07_Vickers_MkE_Type_BT26" Vickers Mk. E Type B
{ "ch07_vickers_mke_type_bt26": { "enabled": true, "distance": 310, "thickness": 1, "alpha": 60, "color": "0x7FDC00" } }, // "Ch07_Vickers_MkE_Type_BT26" Т-26 model 1936
{ "t2_med": { "enabled": true, "distance": 300, "thickness": 1, "alpha": 30, "color": "0xF50800" } }, // "T2_med" T2T1
{ "t2_med": { "enabled": true, "distance": 320, "thickness": 1, "alpha": 60, "color": "0x7FDC00" } }, // "T2_med" T2T2
{ "gb05_vickers_medium_mk_ii": { "enabled": true, "distance": 280, "thickness": 1, "alpha": 30, "color": "0xF50800" } }, // "GB05_Vickers_Medium_Mk_II" Vickers Medium Mk. II*
{ "gb05_vickers_medium_mk_ii": { "enabled": true, "distance": 300, "thickness": 1, "alpha": 60, "color": "0x7FDC00" } }, // "GB05_Vickers_Medium_Mk_II" Vickers Medium Mk. II**
{ "at_1": { "enabled": true, "distance": 250, "thickness": 1, "alpha": 60, "color": "0x7FDC00" } }, // "AT-1" -
{ "panzerjager_i": { "enabled": true, "distance": 320, "thickness": 1, "alpha": 60, "color": "0x7FDC00" } }, // "PanzerJager_I" -
{ "t18": { "enabled": true, "distance": 240, "thickness": 1, "alpha": 60, "color": "0x7FDC00" } }, // "T18" -
{ "renaultft_ac": { "enabled": true, "distance": 320, "thickness": 1, "alpha": 60, "color": "0x7FDC00" } }, // "RenaultFT_AC" -
{ "su_18": { "enabled": true, "distance": 552, "thickness": 1, "alpha": 60, "color": "0x7FDC00" } }, // "SU-18" - (260)*
{ "bison_i": { "enabled": true, "distance": 605, "thickness": 1, "alpha": 60, "color": "0x7FDC00" } }, // "Bison_I" - (320)*
{ "t57": { "enabled": true, "distance": 552, "thickness": 1, "alpha": 60, "color": "0x7FDC00" } }, // "T57" - (330)*
{ "renaultbs": { "enabled": true, "distance": 450, "thickness": 1, "alpha": 60, "color": "0x7FDC00" } }, // "RenaultBS" - (260)*
// level 3
{ "bt_7": { "enabled": true, "distance": 260, "thickness": 1, "alpha": 30, "color": "0xF50800" } }, // "BT-7" BТ-5
{ "bt_7": { "enabled": true, "distance": 280, "thickness": 1, "alpha": 60, "color": "0x7FDC00" } }, // "BT-7" BТ-7
{ "bt_sv": { "enabled": true, "distance": 280, "thickness": 1, "alpha": 60, "color": "0x7FDC00" } }, // "BT-SV" BТ-СВ
{ "m3_stuart_ll": { "enabled": true, "distance": 280, "thickness": 1, "alpha": 60, "color": "0x7FDC00" } }, // "M3_Stuart_LL" D37812
{ "t_127": { "enabled": true, "distance": 320, "thickness": 1, "alpha": 60, "color": "0x7FDC00" } }, // "T-127" Т-127
{ "t_46": { "enabled": true, "distance": 260, "thickness": 1, "alpha": 30, "color": "0xF50800" } }, // "T-46" Т-46
{ "t_46": { "enabled": true, "distance": 310, "thickness": 1, "alpha": 60, "color": "0x7FDC00" } }, // "T-46" Т-46
{ "pz38t": { "enabled": true, "distance": 310, "thickness": 1, "alpha": 30, "color": "0xF50800" } }, // "Pz38t" LT-40-Turm
{ "pz38t": { "enabled": true, "distance": 330, "thickness": 1, "alpha": 60, "color": "0x7FDC00" } }, // "Pz38t" PzKpfw-38-(t)-Turm Ausf. G
{ "pzii_j": { "enabled": true, "distance": 320, "thickness": 1, "alpha": 60, "color": "0x7FDC00" } }, // "PzII_J" PzKpfw-II-Turm Ausf. J
{ "pzii_luchs": { "enabled": true, "distance": 320, "thickness": 1, "alpha": 30, "color": "0xF50800" } }, // "PzII_Luchs" PzKpfw-IIL-Luchsturm
{ "pzii_luchs": { "enabled": true, "distance": 330, "thickness": 1, "alpha": 60, "color": "0x7FDC00" } }, // "PzII_Luchs" PzKpfw-IIL-Großturm
{ "pziii_a": { "enabled": true, "distance": 320, "thickness": 1, "alpha": 30, "color": "0xF50800" } }, // "PzIII_A" PzKpfw-III-Turm Ausf. A
{ "pziii_a": { "enabled": true, "distance": 320, "thickness": 1, "alpha": 60, "color": "0x7FDC00" } }, // "PzIII_A" PzKpfw-III-Turm Ausf. C
{ "t_15": { "enabled": true, "distance": 350, "thickness": 1, "alpha": 60, "color": "0x7FDC00" } }, // "T-15" T-15 Turm
{ "m22_locust": { "enabled": true, "distance": 330, "thickness": 1, "alpha": 60, "color": "0x7FDC00" } }, // "M22_Locust" M22D1
{ "m3_stuart": { "enabled": true, "distance": 280, "thickness": 1, "alpha": 30, "color": "0xF50800" } }, // "M3_Stuart" D37812
{ "m3_stuart": { "enabled": true, "distance": 330, "thickness": 1, "alpha": 60, "color": "0x7FDC00" } }, // "M3_Stuart" D39273
{ "mtls_1g14": { "enabled": true, "distance": 320, "thickness": 1, "alpha": 60, "color": "0x7FDC00" } }, // "MTLS-1G14" MTLS D1
{ "amx38": { "enabled": true, "distance": 310, "thickness": 1, "alpha": 60, "color": "0x7FDC00" } }, // "AMX38" AMX38
{ "gb59_cruiser_mk_iv": { "enabled": true, "distance": 320, "thickness": 1, "alpha": 30, "color": "0xF50800" } }, // "GB59_Cruiser_Mk_IV" Cruiser Mk. IV
{ "gb59_cruiser_mk_iv": { "enabled": true, "distance": 330, "thickness": 1, "alpha": 60, "color": "0x7FDC00" } }, // "GB59_Cruiser_Mk_IV" Cruiser Mk. IVA
{ "gb69_cruiser_mk_ii": { "enabled": true, "distance": 320, "thickness": 1, "alpha": 30, "color": "0xF50800" } }, // "GB69_Cruiser_Mk_II" A10E1
{ "gb69_cruiser_mk_ii": { "enabled": true, "distance": 330, "thickness": 1, "alpha": 60, "color": "0x7FDC00" } }, // "GB69_Cruiser_Mk_II" Cruiser Mk. II
{ "ch08_type97_chi_ha": { "enabled": true, "distance": 310, "thickness": 1, "alpha": 30, "color": "0xF50800" } }, // "Ch08_Type97_Chi_Ha" Type 97
{ "ch08_type97_chi_ha": { "enabled": true, "distance": 330, "thickness": 1, "alpha": 60, "color": "0x7FDC00" } }, // "Ch08_Type97_Chi_Ha" Type 97-Kai
{ "s35_captured": { "enabled": true, "distance": 330, "thickness": 1, "alpha": 60, "color": "0x7FDC00" } }, // "S35_captured" Somuaturm
{ "m2_med": { "enabled": true, "distance": 280, "thickness": 1, "alpha": 30, "color": "0xF50800" } }, // "M2_med" M2M19
{ "m2_med": { "enabled": true, "distance": 370, "thickness": 1, "alpha": 60, "color": "0x7FDC00" } }, // "M2_med" M2M7
{ "d2": { "enabled": true, "distance": 300, "thickness": 1, "alpha": 30, "color": "0xF50800" } }, // "D2" D2
{ "d2": { "enabled": true, "distance": 320, "thickness": 1, "alpha": 60, "color": "0x7FDC00" } }, // "D2" D2 Bis
{ "gb06_vickers_medium_mk_iii": { "enabled": true, "distance": 310, "thickness": 1, "alpha": 30, "color": "0xF50800" } }, // "GB06_Vickers_Medium_Mk_III" Vickers Medium А6Е1
{ "gb06_vickers_medium_mk_iii": { "enabled": true, "distance": 330, "thickness": 1, "alpha": 60, "color": "0x7FDC00" } }, // "GB06_Vickers_Medium_Mk_III" Vickers Medium А6Е3
{ "su_76": { "enabled": true, "distance": 350, "thickness": 1, "alpha": 60, "color": "0x7FDC00" } }, // "SU-76" -
{ "g20_marder_ii": { "enabled": true, "distance": 360, "thickness": 1, "alpha": 60, "color": "0x7FDC00" } }, // "G20_Marder_II" -
{ "t82": { "enabled": true, "distance": 370, "thickness": 1, "alpha": 60, "color": "0x7FDC00" } }, // "T82" -
{ "fcm_36pak40": { "enabled": true, "distance": 400, "thickness": 1, "alpha": 60, "color": "0x7FDC00" } }, // "FCM_36Pak40" -
{ "renaultue57": { "enabled": true, "distance": 360, "thickness": 1, "alpha": 60, "color": "0x7FDC00" } }, // "RenaultUE57" -
{ "su_26": { "enabled": true, "distance": 578, "thickness": 1, "alpha": 60, "color": "0x7FDC00" } }, // "SU-26" СУ-26 (300)*
{ "sturmpanzer_ii": { "enabled": true, "distance": 605, "thickness": 1, "alpha": 60, "color": "0x7FDC00" } }, // "Sturmpanzer_II" - (360)*
{ "wespe": { "enabled": true, "distance": 1000, "thickness": 1, "alpha": 60, "color": "0x7FDC00" } }, // "Wespe" - (350)*
{ "m37": { "enabled": true, "distance": 969, "thickness": 1, "alpha": 60, "color": "0x7FDC00" } }, // "M37" - (370)*
{ "lorraine39_l_am": { "enabled": true, "distance": 844, "thickness": 1, "alpha": 60, "color": "0x7FDC00" } }, // "Lorraine39_L_AM" - (350)*
// level 4
{ "a_20": { "enabled": true, "distance": 300, "thickness": 1, "alpha": 30, "color": "0xF50800" } }, // "A-20" А-20 обр. 1938 г.
{ "a_20": { "enabled": true, "distance": 330, "thickness": 1, "alpha": 60, "color": "0x7FDC00" } }, // "A-20" А-20 бис
{ "t_50": { "enabled": true, "distance": 330, "thickness": 1, "alpha": 60, "color": "0x7FDC00" } }, // "T-50" Т-50
{ "valentine_ll": { "enabled": true, "distance": 350, "thickness": 1, "alpha": 60, "color": "0x7FDC00" } }, // "Valentine_LL" Валентайн II
{ "pz38_na": { "enabled": true, "distance": 330, "thickness": 1, "alpha": 30, "color": "0xF50800" } }, // "Pz38_NA" PzKpfw-38-nA-Standardturm
{ "pz38_na": { "enabled": true, "distance": 370, "thickness": 1, "alpha": 60, "color": "0x7FDC00" } }, // "Pz38_NA" PzKpfw-38-nA-Turm-Ausf. G
{ "vk1602": { "enabled": true, "distance": 350, "thickness": 1, "alpha": 60, "color": "0x7FDC00" } }, // "VK1602" Leopardturm
{ "m5_stuart": { "enabled": true, "distance": 330, "thickness": 1, "alpha": 30, "color": "0xF50800" } }, // "M5_Stuart" M5A1
{ "m5_stuart": { "enabled": true, "distance": 370, "thickness": 1, "alpha": 60, "color": "0x7FDC00" } }, // "M5_Stuart" M8
{ "amx40": { "enabled": true, "distance": 320, "thickness": 1, "alpha": 30, "color": "0xF50800" } }, // "AMX40" AMX40
{ "amx40": { "enabled": true, "distance": 340, "thickness": 1, "alpha": 60, "color": "0x7FDC00" } }, // "AMX40" Renault-Balland
{ "gb04_valentine": { "enabled": true, "distance": 330, "thickness": 1, "alpha": 30, "color": "0xF50800" } }, // "GB04_Valentine" Valentine Mk.I
{ "gb04_valentine": { "enabled": true, "distance": 340, "thickness": 1, "alpha": 60, "color": "0x7FDC00" } }, // "GB04_Valentine" Valentine Mk. XI
{ "gb60_covenanter": { "enabled": true, "distance": 330, "thickness": 1, "alpha": 30, "color": "0xF50800" } }, // "GB60_Covenanter" Covenanter Mk. I
{ "gb60_covenanter": { "enabled": true, "distance": 340, "thickness": 1, "alpha": 60, "color": "0x7FDC00" } }, // "GB60_Covenanter" Covenanter Mk. IV CS
{ "ch09_m5": { "enabled": true, "distance": 330, "thickness": 1, "alpha": 30, "color": "0xF50800" } }, // "Ch09_M5" M3A3
{ "ch09_m5": { "enabled": true, "distance": 350, "thickness": 1, "alpha": 60, "color": "0x7FDC00" } }, // "Ch09_M5" M5A1
{ "a_32": { "enabled": true, "distance": 320, "thickness": 1, "alpha": 60, "color": "0x7FDC00" } }, // "A-32" А-32 обр. 1932 г.
{ "t_28": { "enabled": true, "distance": 320, "thickness": 1, "alpha": 30, "color": "0xF50800" } }, // "T-28" Т-28 цилиндрическая
{ "t_28": { "enabled": true, "distance": 340, "thickness": 1, "alpha": 60, "color": "0x7FDC00" } }, // "T-28" Т-28 коническая
{ "pziii": { "enabled": true, "distance": 330, "thickness": 1, "alpha": 30, "color": "0xF50800" } }, // "PzIII" PzKpfw-III-Turm Ausf. E
{ "pziii": { "enabled": true, "distance": 330, "thickness": 1, "alpha": 60, "color": "0x7FDC00" } }, // "PzIII" PzKpfw-III-Turm Ausf. M
{ "m3_grant": { "enabled": true, "distance": 320, "thickness": 1, "alpha": 60, "color": "0x7FDC00" } }, // "M3_Grant" -
{ "gb07_matilda": { "enabled": true, "distance": 330, "thickness": 1, "alpha": 30, "color": "0xF50800" } }, // "GB07_Matilda" Matilda Mk. IIA
{ "gb07_matilda": { "enabled": true, "distance": 340, "thickness": 1, "alpha": 60, "color": "0x7FDC00" } }, // "GB07_Matilda" Matilda Mk. IIA*
{ "b_1bis_captured": { "enabled": true, "distance": 330, "thickness": 1, "alpha": 60, "color": "0x7FDC00" } }, // "B-1bis_captured" B2-740-(f)-Turm
{ "b1": { "enabled": true, "distance": 300, "thickness": 1, "alpha": 30, "color": "0xF50800" } }, // "B1" B1a
{ "b1": { "enabled": true, "distance": 330, "thickness": 1, "alpha": 60, "color": "0x7FDC00" } }, // "B1" B1b
{ "gaz_74b": { "enabled": true, "distance": 390, "thickness": 1, "alpha": 60, "color": "0x7FDC00" } }, // "GAZ-74b" -
{ "hetzer": { "enabled": true, "distance": 260, "thickness": 1, "alpha": 60, "color": "0x7FDC00" } }, // "Hetzer" -
{ "m8a1": { "enabled": true, "distance": 370, "thickness": 1, "alpha": 30, "color": "0xF50800" } }, // "M8A1" M8A1
{ "m8a1": { "enabled": true, "distance": 370, "thickness": 1, "alpha": 60, "color": "0x7FDC00" } }, // "M8A1" T87
{ "t40": { "enabled": true, "distance": 400, "thickness": 1, "alpha": 60, "color": "0x7FDC00" } }, // "T40" -
{ "somua_sau_40": { "enabled": true, "distance": 330, "thickness": 1, "alpha": 60, "color": "0x7FDC00" } }, // "Somua_Sau_40" -
{ "su_5": { "enabled": true, "distance": 605, "thickness": 1, "alpha": 60, "color": "0x7FDC00" } }, // "SU-5" - (320)*
{ "grille": { "enabled": true, "distance": 1210, "thickness": 1, "alpha": 60, "color": "0x7FDC00" } }, // "Grille" - (360)*
{ "m7_priest": { "enabled": true, "distance": 1047, "thickness": 1, "alpha": 60, "color": "0x7FDC00" } }, // "M7_Priest" - (370)*
{ "_105_lefh18b2": { "enabled": true, "distance": 1000, "thickness": 1, "alpha": 60, "color": "0x7FDC00" } }, // "_105_leFH18B2" - (390)*
{ "amx_105am": { "enabled": true, "distance": 1000, "thickness": 1, "alpha": 60, "color": "0x7FDC00" } }, // "AMX_105AM" - (360)*
// level 5
{ "t_50_2": { "enabled": true, "distance": 330, "thickness": 1, "alpha": 30, "color": "0xF50800" } }, // "T_50_2" Т-50-2
{ "t_50_2": { "enabled": true, "distance": 370, "thickness": 1, "alpha": 60, "color": "0x7FDC00" } }, // "T_50_2" Т-50-2М
{ "vk2801": { "enabled": true, "distance": 350, "thickness": 1, "alpha": 30, "color": "0xF50800" } }, // "VK2801" VK-2801-Turm Ausf. A
{ "vk2801": { "enabled": true, "distance": 390, "thickness": 1, "alpha": 60, "color": "0x7FDC00" } }, // "VK2801" VK-2801-Turm Ausf. F
{ "m24_chaffee": { "enabled": true, "distance": 370, "thickness": 1, "alpha": 30, "color": "0xF50800" } }, // "M24_Chaffee" T24
{ "m24_chaffee": { "enabled": true, "distance": 400, "thickness": 1, "alpha": 60, "color": "0x7FDC00" } }, // "M24_Chaffee" T37
{ "elc_amx": { "enabled": true, "distance": 360, "thickness": 1, "alpha": 60, "color": "0x7FDC00" } }, // "ELC_AMX" ELC AMX
{ "gb20_crusader": { "enabled": true, "distance": 340, "thickness": 1, "alpha": 30, "color": "0xF50800" } }, // "GB20_Crusader" Crusader Mk. I
{ "gb20_crusader": { "enabled": true, "distance": 360, "thickness": 1, "alpha": 60, "color": "0x7FDC00" } }, // "GB20_Crusader" Crusader Mk. III
{ "matilda_ii_ll": { "enabled": true, "distance": 350, "thickness": 1, "alpha": 60, "color": "0x7FDC00" } }, // "Matilda_II_LL" Матильда IV
{ "t_34": { "enabled": true, "distance": 240, "thickness": 1, "alpha": 30, "color": "0xF50800" } }, // "T-34" Т-34 обр. 1940 г.
{ "t_34": { "enabled": true, "distance": 350, "thickness": 1, "alpha": 60, "color": "0x7FDC00" } }, // "T-34" Т-34 обр. 1942 г.
{ "pziii_iv": { "enabled": true, "distance": 320, "thickness": 1, "alpha": 30, "color": "0xF50800" } }, // "PzIII_IV" PzKpfw-IV-Turm Ausf. F
{ "pziii_iv": { "enabled": true, "distance": 320, "thickness": 1, "alpha": 60, "color": "0x7FDC00" } }, // "PzIII_IV" PzKpfw-IV-Turm Ausf. H
{ "pziv": { "enabled": true, "distance": 330, "thickness": 1, "alpha": 30, "color": "0xF50800" } }, // "PzIV" Turm Ausf. G
{ "pziv": { "enabled": true, "distance": 350, "thickness": 1, "alpha": 60, "color": "0x7FDC00" } }, // "PzIV" Turm Ausf. Н
{ "pziv_hydro": { "enabled": true, "distance": 350, "thickness": 1, "alpha": 60, "color": "0x7FDC00" } }, // "PzIV_Hydro" PzKpfw-IV-Turm Ausf. J
{ "t_25": { "enabled": true, "distance": 320, "thickness": 1, "alpha": 60, "color": "0x7FDC00" } }, // "T-25" T-25 Turm
{ "m4_sherman": { "enabled": true, "distance": 330, "thickness": 1, "alpha": 30, "color": "0xF50800" } }, // "M4_Sherman" D51066
{ "m4_sherman": { "enabled": true, "distance": 370, "thickness": 1, "alpha": 60, "color": "0x7FDC00" } }, // "M4_Sherman" D51072
{ "m4a2e4": { "enabled": true, "distance": 370, "thickness": 1, "alpha": 60, "color": "0x7FDC00" } }, // "M4A2E4" M4A2E4D51066
{ "m7_med": { "enabled": true, "distance": 370, "thickness": 1, "alpha": 30, "color": "0xF50800" } }, // "M7_med" M24A1
{ "m7_med": { "enabled": true, "distance": 380, "thickness": 1, "alpha": 60, "color": "0x7FDC00" } }, // "M7_med" M47
{ "ram_ii": { "enabled": true, "distance": 330, "thickness": 1, "alpha": 60, "color": "0x7FDC00" } }, // "Ram-II" Ram II D1
{ "gb68_matilda_black_prince": { "enabled": true, "distance": 350, "thickness": 1, "alpha": 60, "color": "0x7FDC00" } }, // "GB68_Matilda_Black_Prince" Matilda Black Prince
{ "ch21_t34": { "enabled": true, "distance": 320, "thickness": 1, "alpha": 30, "color": "0xF50800" } }, // "Ch21_T34" Type T-34
{ "ch21_t34": { "enabled": true, "distance": 350, "thickness": 1, "alpha": 60, "color": "0x7FDC00" } }, // "Ch21_T34" Type T-34M
{ "churchill_ll": { "enabled": true, "distance": 350, "thickness": 1, "alpha": 60, "color": "0x7FDC00" } }, // "Churchill_LL" Churchill MK III
{ "kv": { "enabled": true, "distance": 310, "thickness": 1, "alpha": 30, "color": "0xF50800" } }, // "KV" КВ-1
{ "kv": { "enabled": true, "distance": 310, "thickness": 1, "alpha": 60, "color": "0x7FDC00" } }, // "KV" КВ-2
{ "kv1": { "enabled": true, "distance": 310, "thickness": 1, "alpha": 30, "color": "0xF50800" } }, // "KV1" КВ-1
{ "kv1": { "enabled": true, "distance": 310, "thickness": 1, "alpha": 60, "color": "0x7FDC00" } }, // "KV1" Проект ЧТЗ обр. 1942 г.
{ "kv_220": { "enabled": true, "distance": 310, "thickness": 1, "alpha": 60, "color": "0x7FDC00" } }, // "KV-220" КВ-220
{ "kv_220_action": { "enabled": true, "distance": 310, "thickness": 1, "alpha": 60, "color": "0x7FDC00" } }, // "KV-220_action" КВ-220
{ "t1_hvy": { "enabled": true, "distance": 320, "thickness": 1, "alpha": 30, "color": "0xF50800" } }, // "T1_hvy" T1D5
{ "t1_hvy": { "enabled": true, "distance": 330, "thickness": 1, "alpha": 60, "color": "0x7FDC00" } }, // "T1_hvy" T1D6
{ "t14": { "enabled": true, "distance": 330, "thickness": 1, "alpha": 60, "color": "0x7FDC00" } }, // "T14" T14
{ "bdr_g1b": { "enabled": true, "distance": 300, "thickness": 1, "alpha": 30, "color": "0xF50800" } }, // "BDR_G1B" FCMF4
{ "bdr_g1b": { "enabled": true, "distance": 320, "thickness": 1, "alpha": 60, "color": "0x7FDC00" } }, // "BDR_G1B" ARL-3
{ "gb08_churchill_i": { "enabled": true, "distance": 330, "thickness": 1, "alpha": 30, "color": "0xF50800" } }, // "GB08_Churchill_I" Churchill Mk. I
{ "gb08_churchill_i": { "enabled": true, "distance": 350, "thickness": 1, "alpha": 60, "color": "0x7FDC00" } }, // "GB08_Churchill_I" Churchill Mk. III
{ "su_85i": { "enabled": true, "distance": 320, "thickness": 1, "alpha": 60, "color": "0x7FDC00" } }, // "SU_85I" -
{ "su_85": { "enabled": true, "distance": 280, "thickness": 1, "alpha": 60, "color": "0x7FDC00" } }, // "SU-85" -
{ "stugiii": { "enabled": true, "distance": 310, "thickness": 1, "alpha": 60, "color": "0x7FDC00" } }, // "StuGIII" -
{ "m10_wolverine": { "enabled": true, "distance": 370, "thickness": 1, "alpha": 30, "color": "0xF50800" } }, // "M10_Wolverine" M10T72
{ "m10_wolverine": { "enabled": true, "distance": 370, "thickness": 1, "alpha": 60, "color": "0x7FDC00" } }, // "M10_Wolverine" M10T72M1
{ "t49": { "enabled": true, "distance": 370, "thickness": 1, "alpha": 30, "color": "0xF50800" } }, // "T49" ? Rock Island Arsenal
{ "t49": { "enabled": true, "distance": 350, "thickness": 1, "alpha": 60, "color": "0x7FDC00" } }, // "T49" ? T49M34
{ "s_35ca": { "enabled": true, "distance": 400, "thickness": 1, "alpha": 60, "color": "0x7FDC00" } }, // "S_35CA" -
{ "su_8": { "enabled": true, "distance": 920, "thickness": 1, "alpha": 60, "color": "0x7FDC00" } }, // "SU-8" - (360)*
{ "hummel": { "enabled": true, "distance": 1264, "thickness": 1, "alpha": 60, "color": "0x7FDC00" } }, // "Hummel" - (370)*
{ "m41": { "enabled": true, "distance": 1210, "thickness": 1, "alpha": 60, "color": "0x7FDC00" } }, // "M41" - (370)*
{ "amx_13f3am": { "enabled": true, "distance": 1250, "thickness": 1, "alpha": 60, "color": "0x7FDC00" } }, // "AMX_13F3AM" - (370)*
// level 6
{ "t21": { "enabled": true, "distance": 390, "thickness": 1, "alpha": 60, "color": "0x7FDC00" } }, // "T21" T21
{ "amx_12t": { "enabled": true, "distance": 380, "thickness": 1, "alpha": 60, "color": "0x7FDC00" } }, // "AMX_12t" AMX B
{ "ch15_59_16": { "enabled": true, "distance": 360, "thickness": 1, "alpha": 30, "color": "0xF50800" } }, // "Ch15_59_16" 131
{ "ch15_59_16": { "enabled": true, "distance": 380, "thickness": 1, "alpha": 60, "color": "0x7FDC00" } }, // "Ch15_59_16" 131-1
{ "t_34_85": { "enabled": true, "distance": 350, "thickness": 1, "alpha": 30, "color": "0xF50800" } }, // "T-34-85" Т-34-85
{ "t_34_85": { "enabled": true, "distance": 360, "thickness": 1, "alpha": 60, "color": "0x7FDC00" } }, // "T-34-85" Т-34-85 расширенная
{ "pziv_schmalturm": { "enabled": true, "distance": 370, "thickness": 1, "alpha": 60, "color": "0x7FDC00" } }, // "PzIV_schmalturm" PzKpfw-IV-Schmalturm
{ "pzv_pziv": { "enabled": true, "distance": 320, "thickness": 1, "alpha": 60, "color": "0x7FDC00" } }, // "PzV_PzIV" PzKpfw-IV-Turm
{ "pzv_pziv_ausf_alfa": { "enabled": true, "distance": 320, "thickness": 1, "alpha": 60, "color": "0x7FDC00" } }, // "PzV_PzIV_ausf_Alfa" PzKpfw-IV-Turm
{ "vk3001h": { "enabled": true, "distance": 350, "thickness": 1, "alpha": 30, "color": "0xF50800" } }, // "VK3001H" VK-3001-(H)-Standardturm
{ "vk3001h": { "enabled": true, "distance": 370, "thickness": 1, "alpha": 60, "color": "0x7FDC00" } }, // "VK3001H" VK-3001-(H)-Großturm
{ "vk3001p": { "enabled": true, "distance": 350, "thickness": 1, "alpha": 30, "color": "0xF50800" } }, // "VK3001P" VK-3001-(P)-Krupp-Turm
{ "vk3001p": { "enabled": true, "distance": 370, "thickness": 1, "alpha": 60, "color": "0x7FDC00" } }, // "VK3001P" VK-3001-(P)-Porsche-Turm
{ "vk3601h": { "enabled": true, "distance": 370, "thickness": 1, "alpha": 30, "color": "0xF50800" } }, // "VK3601H" VK-3601-(H)-Standardturm
{ "vk3601h": { "enabled": true, "distance": 370, "thickness": 1, "alpha": 60, "color": "0x7FDC00" } }, // "VK3601H" VK-3601-(H)-Großturm
{ "m4a3e8_sherman": { "enabled": true, "distance": 330, "thickness": 1, "alpha": 30, "color": "0xF50800" } }, // "M4A3E8_Sherman" D51072
{ "m4a3e8_sherman": { "enabled": true, "distance": 370, "thickness": 1, "alpha": 60, "color": "0x7FDC00" } }, // "M4A3E8_Sherman" D51080
{ "sherman_jumbo": { "enabled": true, "distance": 330, "thickness": 1, "alpha": 30, "color": "0xF50800" } }, // "Sherman_Jumbo" M4A2E2T110
{ "sherman_jumbo": { "enabled": true, "distance": 370, "thickness": 1, "alpha": 60, "color": "0x7FDC00" } }, // "Sherman_Jumbo" M4A2E2D51080
{ "gb21_cromwell": { "enabled": true, "distance": 360, "thickness": 1, "alpha": 30, "color": "0xF50800" } }, // "GB21_Cromwell" Cromwell Mk. I
{ "gb21_cromwell": { "enabled": true, "distance": 360, "thickness": 1, "alpha": 60, "color": "0x7FDC00" } }, // "GB21_Cromwell" Cromwell Mk. IV
{ "ch20_type58": { "enabled": true, "distance": 360, "thickness": 1, "alpha": 30, "color": "0xF50800" } }, // "Ch20_Type58" T-34-85
{ "ch20_type58": { "enabled": true, "distance": 370, "thickness": 1, "alpha": 60, "color": "0x7FDC00" } }, // "Ch20_Type58" Type 58
{ "kv_1s": { "enabled": true, "distance": 320, "thickness": 1, "alpha": 30, "color": "0xF50800" } }, // "KV-1s" КВ-1С обр. 1942 г.
{ "kv_1s": { "enabled": true, "distance": 330, "thickness": 1, "alpha": 60, "color": "0x7FDC00" } }, // "KV-1s" КВ-85
{ "kv2": { "enabled": true, "distance": 320, "thickness": 1, "alpha": 30, "color": "0xF50800" } }, // "KV2" МТ-1
{ "kv2": { "enabled": true, "distance": 330, "thickness": 1, "alpha": 60, "color": "0x7FDC00" } }, // "KV2" МТ-2
{ "t150": { "enabled": true, "distance": 320, "thickness": 1, "alpha": 30, "color": "0xF50800" } }, // "T150" Т-150-КВ
{ "t150": { "enabled": true, "distance": 330, "thickness": 1, "alpha": 60, "color": "0x7FDC00" } }, // "T150" Т-150-220
{ "m6": { "enabled": true, "distance": 320, "thickness": 1, "alpha": 30, "color": "0xF50800" } }, // "M6" M6D1
{ "m6": { "enabled": true, "distance": 350, "thickness": 1, "alpha": 60, "color": "0x7FDC00" } }, // "M6" M6D2
{ "arl_44": { "enabled": true, "distance": 320, "thickness": 1, "alpha": 30, "color": "0xF50800" } }, // "ARL_44" ARL 44 expérimentale
{ "arl_44": { "enabled": true, "distance": 330, "thickness": 1, "alpha": 60, "color": "0x7FDC00" } }, // "ARL_44" ARL 44 nouvelle
{ "gb09_churchill_vii": { "enabled": true, "distance": 350, "thickness": 1, "alpha": 30, "color": "0xF50800" } }, // "GB09_Churchill_VII" Churchill Mk. IV
{ "gb09_churchill_vii": { "enabled": true, "distance": 360, "thickness": 1, "alpha": 60, "color": "0x7FDC00" } }, // "GB09_Churchill_VII" Churchill Mk. VII
{ "gb63_tog_ii": { "enabled": true, "distance": 360, "thickness": 1, "alpha": 60, "color": "0x7FDC00" } }, // "GB63_TOG_II" TOG II
{ "su_100": { "enabled": true, "distance": 350, "thickness": 1, "alpha": 60, "color": "0x7FDC00" } }, // "SU-100" -
{ "su100y": { "enabled": true, "distance": 000, "thickness": 1, "alpha": 60, "color": "0x7FDC00" } }, // "SU100Y" ? (не введен в игру)
{ "dickermax": { "enabled": true, "distance": 400, "thickness": 1, "alpha": 60, "color": "0x7FDC00" } }, // "DickerMax" -
{ "jagdpziv": { "enabled": true, "distance": 330, "thickness": 1, "alpha": 60, "color": "0x7FDC00" } }, // "JagdPzIV" -
{ "m18_hellcat": { "enabled": true, "distance": 370, "thickness": 1, "alpha": 30, "color": "0xF50800" } }, // "M18_Hellcat" M18 M34A1
{ "m18_hellcat": { "enabled": true, "distance": 370, "thickness": 1, "alpha": 60, "color": "0x7FDC00" } }, // "M18_Hellcat" M18 M1
{ "m36_slagger": { "enabled": true, "distance": 370, "thickness": 1, "alpha": 30, "color": "0xF50800" } }, // "M36_Slagger" M36T74
{ "m36_slagger": { "enabled": true, "distance": 370, "thickness": 1, "alpha": 60, "color": "0x7FDC00" } }, // "M36_Slagger" M36T78
{ "arl_v39": { "enabled": true, "distance": 350, "thickness": 1, "alpha": 60, "color": "0x7FDC00" } }, // "ARL_V39" -
{ "s_51": { "enabled": true, "distance": 1229, "thickness": 1, "alpha": 60, "color": "0x7FDC00" } }, // "S-51" - (370)*
{ "su_14": { "enabled": true, "distance": 1229, "thickness": 1, "alpha": 60, "color": "0x7FDC00" } }, // "SU-14" - (300)*
{ "g_panther": { "enabled": true, "distance": 1400, "thickness": 1, "alpha": 60, "color": "0x7FDC00" } }, // "G_Panther" GW-Panther-Aufbau Ausf. A(350)*
{ "m12": { "enabled": true, "distance": 1316, "thickness": 1, "alpha": 60, "color": "0x7FDC00" } }, // "M12" - (380)*
{ "lorraine155_50": { "enabled": true, "distance": 1202, "thickness": 1, "alpha": 60, "color": "0x7FDC00" } }, // "Lorraine155_50" - (370)*
// level 7
{ "t71": { "enabled": true, "distance": 400, "thickness": 1, "alpha": 60, "color": "0x7FDC00" } }, // "T71" T71
{ "amx_13_75": { "enabled": true, "distance": 390, "thickness": 1, "alpha": 60, "color": "0x7FDC00" } }, // "AMX_13_75" FL10
{ "ch02_type62": { "enabled": true, "distance": 390, "thickness": 1, "alpha": 60, "color": "0x7FDC00" } }, // "Ch02_Type62" Type 62
{ "ch16_wz_131": { "enabled": true, "distance": 380, "thickness": 1, "alpha": 30, "color": "0xF50800" } }, // "Ch16_WZ_131" 132A
{ "ch16_wz_131": { "enabled": true, "distance": 390, "thickness": 1, "alpha": 60, "color": "0x7FDC00" } }, // "Ch16_WZ_131" 132B
{ "kv_13": { "enabled": true, "distance": 340, "thickness": 1, "alpha": 30, "color": "0xF50800" } }, // "KV-13" КВ-13
{ "kv_13": { "enabled": true, "distance": 360, "thickness": 1, "alpha": 60, "color": "0x7FDC00" } }, // "KV-13" КВ-13М
{ "t_43": { "enabled": true, "distance": 360, "thickness": 1, "alpha": 30, "color": "0xF50800" } }, // "T-43" Т-43 обр. 1942 г.
{ "t_43": { "enabled": true, "distance": 370, "thickness": 1, "alpha": 60, "color": "0x7FDC00" } }, // "T-43" Т-43 обр. 1943 г.
{ "panther_m10": { "enabled": true, "distance": 350, "thickness": 1, "alpha": 60, "color": "0x7FDC00" } }, // "Panther_M10" PzKpfw-V-Turm Ausf. G
{ "pzv": { "enabled": true, "distance": 350, "thickness": 1, "alpha": 30, "color": "0xF50800" } }, // "PzV" PzKpfw-V-Turm Ausf. G
{ "pzv": { "enabled": true, "distance": 380, "thickness": 1, "alpha": 60, "color": "0x7FDC00" } }, // "PzV" PzKpfw-V-Schmalturm
{ "vk3002db": { "enabled": true, "distance": 350, "thickness": 1, "alpha": 30, "color": "0xF50800" } }, // "VK3002DB" VK-3002-(DB)-Turm
{ "vk3002db": { "enabled": true, "distance": 370, "thickness": 1, "alpha": 60, "color": "0x7FDC00" } }, // "VK3002DB" VK-3002-(DB)-Schmalturm
{ "t20": { "enabled": true, "distance": 370, "thickness": 1, "alpha": 30, "color": "0xF50800" } }, // "T20" T20D1
{ "t20": { "enabled": true, "distance": 390, "thickness": 1, "alpha": 60, "color": "0x7FDC00" } }, // "T20" T20D2
{ "gb22_comet": { "enabled": true, "distance": 360, "thickness": 1, "alpha": 30, "color": "0xF50800" } }, // "GB22_Comet" Cromwell Mk. IV
{ "gb22_comet": { "enabled": true, "distance": 380, "thickness": 1, "alpha": 60, "color": "0x7FDC00" } }, // "GB22_Comet" Comet Mk. I
{ "ch04_t34_1": { "enabled": true, "distance": 360, "thickness": 1, "alpha": 30, "color": "0xF50800" } }, // "Ch04_T34_1" T-34-1
{ "ch04_t34_1": { "enabled": true, "distance": 370, "thickness": 1, "alpha": 60, "color": "0x7FDC00" } }, // "Ch04_T34_1" T-34-1 model 2
{ "is": { "enabled": true, "distance": 330, "thickness": 1, "alpha": 30, "color": "0xF50800" } }, // "IS" ИС-85
{ "is": { "enabled": true, "distance": 350, "thickness": 1, "alpha": 60, "color": "0x7FDC00" } }, // "IS" ИС-122
{ "kv_3": { "enabled": true, "distance": 330, "thickness": 1, "alpha": 30, "color": "0xF50800" } }, // "KV-3" Образца КВ-220
{ "kv_3": { "enabled": true, "distance": 340, "thickness": 1, "alpha": 60, "color": "0x7FDC00" } }, // "KV-3" КВ-3
{ "pzvi": { "enabled": true, "distance": 350, "thickness": 1, "alpha": 30, "color": "0xF50800" } }, // "PzVI" PzKpfw-VI-Tiger-I-Turm Ausf.H2
{ "pzvi": { "enabled": true, "distance": 370, "thickness": 1, "alpha": 60, "color": "0x7FDC00" } }, // "PzVI" fw-VI-Tiger-I-Porscheturm
{ "pzvi_tiger_p": { "enabled": true, "distance": 370, "thickness": 1, "alpha": 30, "color": "0xF50800" } }, // "PzVI_Tiger_P" Tiger-(P)-Turm Ausf. A
{ "pzvi_tiger_p": { "enabled": true, "distance": 370, "thickness": 1, "alpha": 60, "color": "0x7FDC00" } }, // "PzVI_Tiger_P" Tiger-(P)-Turm Ausf. F
{ "t29": { "enabled": true, "distance": 330, "thickness": 1, "alpha": 30, "color": "0xF50800" } }, // "T29" T123
{ "t29": { "enabled": true, "distance": 380, "thickness": 1, "alpha": 60, "color": "0x7FDC00" } }, // "T29" T136
{ "amx_m4_1945": { "enabled": true, "distance": 330, "thickness": 1, "alpha": 30, "color": "0xF50800" } }, // "AMX_M4_1945" Schneider 44B
{ "amx_m4_1945": { "enabled": true, "distance": 360, "thickness": 1, "alpha": 60, "color": "0x7FDC00" } }, // "AMX_M4_1945" AMX M4
{ "gb10_black_prince": { "enabled": true, "distance": 370, "thickness": 1, "alpha": 60, "color": "0x7FDC00" } }, // "GB10_Black_Prince" Black Prince
{ "ch10_is2": { "enabled": true, "distance": 350, "thickness": 1, "alpha": 30, "color": "0xF50800" } }, // "Ch10_IS2" IS-2 early
{ "ch10_is2": { "enabled": true, "distance": 350, "thickness": 1, "alpha": 60, "color": "0x7FDC00" } }, // "Ch10_IS2" IS-2 late
{ "su100m1": { "enabled": true, "distance": 360, "thickness": 1, "alpha": 60, "color": "0x7FDC00" } }, // "SU100M1" -
{ "su122_44": { "enabled": true, "distance": 330, "thickness": 1, "alpha": 60, "color": "0x7FDC00" } }, // "SU122_44" -
{ "su_152": { "enabled": true, "distance": 330, "thickness": 1, "alpha": 60, "color": "0x7FDC00" } }, // "SU-152" -
{ "jagdpanther": { "enabled": true, "distance": 350, "thickness": 1, "alpha": 60, "color": "0x7FDC00" } }, // "JagdPanther" -
{ "t25_2": { "enabled": true, "distance": 380, "thickness": 1, "alpha": 60, "color": "0x7FDC00" } }, // "T25_2" T25/2T3
{ "t25_2": { "enabled": true, "distance": 380, "thickness": 1, "alpha": 60, "color": "0x7FDC00" } }, // "T25_2" T25/2T7
{ "t25_at": { "enabled": true, "distance": 350, "thickness": 1, "alpha": 60, "color": "0x7FDC00" } }, // "T25_AT" -
{ "amx_ac_mle1946": { "enabled": true, "distance": 350, "thickness": 1, "alpha": 60, "color": "0x7FDC00" } }, // "AMX_AC_Mle1946" -
{ "gb71_at_15a": { "enabled": true, "distance": 350, "thickness": 1, "alpha": 60, "color": "0x7FDC00" } }, // "GB71_AT_15A" -
{ "object_212": { "enabled": true, "distance": 1229, "thickness": 1, "alpha": 60, "color": "0x7FDC00" } }, // "Object_212" - (330)*
{ "g_tiger": { "enabled": true, "distance": 1172, "thickness": 1, "alpha": 60, "color": "0x7FDC00" } }, // "G_Tiger" - (380)*
{ "m40m43": { "enabled": true, "distance": 1179, "thickness": 1, "alpha": 60, "color": "0x7FDC00" } }, // "M40M43" - (390)*
{ "lorraine155_51": { "enabled": true, "distance": 1296, "thickness": 1, "alpha": 60, "color": "0x7FDC00" } }, // "Lorraine155_51" - (380)*
// level 8
{ "amx_13_90": { "enabled": true, "distance": 400, "thickness": 1, "alpha": 60, "color": "0x7FDC00" } }, // "AMX_13_90" FL12
{ "ch17_wz131_1_wz132": { "enabled": true, "distance": 390, "thickness": 1, "alpha": 30, "color": "0xF50800" } }, // "Ch17_WZ131_1_WZ132" WZ-131-1
{ "ch17_wz131_1_wz132": { "enabled": true, "distance": 400, "thickness": 1, "alpha": 60, "color": "0x7FDC00" } }, // "Ch17_WZ131_1_WZ132" WZ-132
{ "t_44": { "enabled": true, "distance": 370, "thickness": 1, "alpha": 30, "color": "0xF50800" } }, // "T-44" T-44
{ "t_44": { "enabled": true, "distance": 380, "thickness": 1, "alpha": 60, "color": "0x7FDC00" } }, // "T-44" T-44Б
{ "panther_ii": { "enabled": true, "distance": 380, "thickness": 1, "alpha": 30, "color": "0xF50800" } }, // "Panther_II" Panther-II-Turm Ausf. A
{ "panther_ii": { "enabled": true, "distance": 390, "thickness": 1, "alpha": 60, "color": "0x7FDC00" } }, // "Panther_II" Panther-II-Schmalturm
{ "pershing": { "enabled": true, "distance": 390, "thickness": 1, "alpha": 30, "color": "0xF50800" } }, // "Pershing" M26M67
{ "pershing": { "enabled": true, "distance": 400, "thickness": 1, "alpha": 60, "color": "0x7FDC00" } }, // "Pershing" M26M71
{ "t23": { "enabled": true, "distance": 430, "thickness": 1, "alpha": 30, "color": "0xF50800" } }, // "T23" T23T80 (баз.)
{ "t23": { "enabled": true, "distance": 430, "thickness": 1, "alpha": 60, "color": "0x7FDC00" } }, // "T23" T23D51080
{ "t26_e4_superpershing": { "enabled": true, "distance": 380, "thickness": 1, "alpha": 60, "color": "0x7FDC00" } }, // "T26_E4_SuperPershing" T26E4
{ "t69": { "enabled": true, "distance": 400, "thickness": 1, "alpha": 60, "color": "0x7FDC00" } }, // "T69" T178
{ "gb23_centurion": { "enabled": true, "distance": 380, "thickness": 1, "alpha": 30, "color": "0xF50800" } }, // "GB23_Centurion" Centurion Mk. I
{ "gb23_centurion": { "enabled": true, "distance": 400, "thickness": 1, "alpha": 60, "color": "0x7FDC00" } }, // "GB23_Centurion" Centurion Mk. III
{ "ch01_type59": { "enabled": true, "distance": 380, "thickness": 1, "alpha": 60, "color": "0x7FDC00" } }, // "Ch01_Type59" Type 59
{ "ch01_type59_gold": { "enabled": true, "distance": 380, "thickness": 1, "alpha": 60, "color": "0x7FDC00" } }, // "Ch01_Type59_Gold" * Type 59 G(no russian server)
{ "ch05_t34_2": { "enabled": true, "distance": 370, "thickness": 1, "alpha": 30, "color": "0xF50800" } }, // "Ch05_T34_2" T-34-2
{ "ch05_t34_2": { "enabled": true, "distance": 380, "thickness": 1, "alpha": 60, "color": "0x7FDC00" } }, // "Ch05_T34_2" T-34-2 model 2
{ "is_3": { "enabled": true, "distance": 330, "thickness": 1, "alpha": 30, "color": "0xF50800" } }, // "IS-3" Кировец-1
{ "is_3": { "enabled": true, "distance": 350, "thickness": 1, "alpha": 60, "color": "0x7FDC00" } }, // "IS-3" ИС-3
{ "kv4": { "enabled": true, "distance": 330, "thickness": 1, "alpha": 30, "color": "0xF50800" } }, // "KV4" КВ-4
{ "kv4": { "enabled": true, "distance": 350, "thickness": 1, "alpha": 60, "color": "0x7FDC00" } }, // "KV4" КВ-4-5
{ "kv_5": { "enabled": true, "distance": 350, "thickness": 1, "alpha": 60, "color": "0x7FDC00" } }, // "KV-5" КВ-5
{ "object252": { "enabled": true, "distance": 350, "thickness": 1, "alpha": 60, "color": "0x7FDC00" } }, // "Object252" ИС-6
{ "lowe": { "enabled": true, "distance": 400, "thickness": 1, "alpha": 60, "color": "0x7FDC00" } }, // "Lowe" Löweturm
{ "pzvib_tiger_ii": { "enabled": true, "distance": 400, "thickness": 1, "alpha": 30, "color": "0xF50800" } }, // "PzVIB_Tiger_II" PzKpfw-VIB-Porsche-Turm
{ "pzvib_tiger_ii": { "enabled": true, "distance": 400, "thickness": 1, "alpha": 60, "color": "0x7FDC00" } }, // "PzVIB_Tiger_II" PzKpfw-VIB-Henschel-Turm
{ "vk4502a": { "enabled": true, "distance": 400, "thickness": 1, "alpha": 30, "color": "0xF50800" } }, // "VK4502A" VK-4502-(A)-Turm Ausf. A
{ "vk4502a": { "enabled": true, "distance": 400, "thickness": 1, "alpha": 60, "color": "0x7FDC00" } }, // "VK4502A" VK-4502-(A)-Turm Ausf. F
{ "m6a2e1": { "enabled": true, "distance": 380, "thickness": 1, "alpha": 60, "color": "0x7FDC00" } }, // "M6A2E1" M6A2E1D4
{ "t32": { "enabled": true, "distance": 380, "thickness": 1, "alpha": 30, "color": "0xF50800" } }, // "T32" T99E2
{ "t32": { "enabled": true, "distance": 400, "thickness": 1, "alpha": 60, "color": "0x7FDC00" } }, // "T32" T119
{ "t34_hvy": { "enabled": true, "distance": 360, "thickness": 1, "alpha": 60, "color": "0x7FDC00" } }, // "T34_hvy" T34T7
{ "amx_50_100": { "enabled": true, "distance": 380, "thickness": 1, "alpha": 60, "color": "0x7FDC00" } }, // "AMX_50_100" AMX 50 100
{ "fcm_50t": { "enabled": true, "distance": 400, "thickness": 1, "alpha": 60, "color": "0x7FDC00" } }, // "FCM_50t" FCM 50 t
{ "gb11_caernarvon": { "enabled": true, "distance": 370, "thickness": 1, "alpha": 30, "color": "0xF50800" } }, // "GB11_Caernarvon" Black Prince
{ "gb11_caernarvon": { "enabled": true, "distance": 400, "thickness": 1, "alpha": 60, "color": "0x7FDC00" } }, // "GB11_Caernarvon" Centurion Mk. II
{ "ch03_wz_111": { "enabled": true, "distance": 380, "thickness": 1, "alpha": 60, "color": "0x7FDC00" } }, // "Ch03_WZ-111" * WZ-111 model 2(no russian server)
{ "ch11_110": { "enabled": true, "distance": 350, "thickness": 1, "alpha": 30, "color": "0xF50800" } }, // "Ch11_110" 110
{ "ch11_110": { "enabled": true, "distance": 380, "thickness": 1, "alpha": 60, "color": "0x7FDC00" } }, // "Ch11_110" T-10
{ "isu_152": { "enabled": true, "distance": 370, "thickness": 1, "alpha": 60, "color": "0x7FDC00" } }, // "ISU-152" -
{ "su_101": { "enabled": true, "distance": 380, "thickness": 1, "alpha": 60, "color": "0x7FDC00" } }, // "SU-101" -
{ "ferdinand": { "enabled": true, "distance": 370, "thickness": 1, "alpha": 60, "color": "0x7FDC00" } }, // "Ferdinand" -
{ "jagdpantherii": { "enabled": true, "distance": 380, "thickness": 1, "alpha": 60, "color": "0x7FDC00" } }, // "JagdPantherII" -
{ "jagdtiger_sdkfz_185": { "enabled": true, "distance": 390, "thickness": 1, "alpha": 60, "color": "0x7FDC00" } }, // "JagdTiger_SdKfz_185" -
{ "t28": { "enabled": true, "distance": 370, "thickness": 1, "alpha": 60, "color": "0x7FDC00" } }, // "T28" -
{ "t28_prototype": { "enabled": true, "distance": 380, "thickness": 1, "alpha": 60, "color": "0x7FDC00" } }, // "T28_Prototype" T28P D1
{ "amx_ac_mle1948": { "enabled": true, "distance": 370, "thickness": 1, "alpha": 60, "color": "0x7FDC00" } }, // "AMX_AC_Mle1948" -
{ "object_261": { "enabled": true, "distance": 1463, "thickness": 1, "alpha": 60, "color": "0x7FDC00" } }, // "Object_261" - (380)*
{ "g_e": { "enabled": true, "distance": 1172, "thickness": 1, "alpha": 60, "color": "0x7FDC00" } }, // "G_E" - (390)*
{ "t92": { "enabled": true, "distance": 1248, "thickness": 1, "alpha": 60, "color": "0x7FDC00" } }, // "T92" - (400)*
{ "bat_chatillon155": { "enabled": true, "distance": 1296, "thickness": 1, "alpha": 60, "color": "0x7FDC00" } }, // "Bat_Chatillon155" Bat Chatillon 155(390)*
// level 9
{ "t_54": { "enabled": true, "distance": 390, "thickness": 1, "alpha": 30, "color": "0xF50800" } }, // "T-54" Т-54 обр. 1946 г.
{ "t_54": { "enabled": true, "distance": 390, "thickness": 1, "alpha": 60, "color": "0x7FDC00" } }, // "T-54" Т-54 обр. 1949 г.
{ "e_50": { "enabled": true, "distance": 390, "thickness": 1, "alpha": 30, "color": "0xF50800" } }, // "E-50" E-50-Turm Ausf. A
{ "e_50": { "enabled": true, "distance": 400, "thickness": 1, "alpha": 60, "color": "0x7FDC00" } }, // "E-50" E-50-Turm Ausf. F
{ "m46_patton": { "enabled": true, "distance": 400, "thickness": 1, "alpha": 30, "color": "0xF50800" } }, // "M46_Patton" M46M73
{ "m46_patton": { "enabled": true, "distance": 410, "thickness": 1, "alpha": 60, "color": "0x7FDC00" } }, // "M46_Patton" M46T119
{ "t54e1": { "enabled": true, "distance": 400, "thickness": 1, "alpha": 60, "color": "0x7FDC00" } }, // "T54E1" T157
{ "lorraine40t": { "enabled": true, "distance": 400, "thickness": 1, "alpha": 60, "color": "0x7FDC00" } }, // "Lorraine40t" Lorraine 40 t
{ "gb24_centurion_mk3": { "enabled": true, "distance": 400, "thickness": 1, "alpha": 30, "color": "0xF50800" } }, // "GB24_Centurion_Mk3" Centurion Mk. 7
{ "gb24_centurion_mk3": { "enabled": true, "distance": 410, "thickness": 1, "alpha": 60, "color": "0x7FDC00" } }, // "GB24_Centurion_Mk3" Centurion Mk. 9
{ "ch18_wz_120": { "enabled": true, "distance": 380, "thickness": 1, "alpha": 30, "color": "0xF50800" } }, // "Ch18_WZ-120" WZ-120
{ "ch18_wz_120": { "enabled": true, "distance": 390, "thickness": 1, "alpha": 60, "color": "0x7FDC00" } }, // "Ch18_WZ-120" WZ-120-1
{ "is8": { "enabled": true, "distance": 380, "thickness": 1, "alpha": 30, "color": "0xF50800" } }, // "IS8" Т-10
{ "is8": { "enabled": true, "distance": 400, "thickness": 1, "alpha": 60, "color": "0x7FDC00" } }, // "IS8" Т-10М
{ "st_i": { "enabled": true, "distance": 360, "thickness": 1, "alpha": 30, "color": "0xF50800" } }, // "ST_I" СТ-I об.701 №4
{ "st_i": { "enabled": true, "distance": 380, "thickness": 1, "alpha": 60, "color": "0x7FDC00" } }, // "ST_I" СТ-I
{ "e_75": { "enabled": true, "distance": 400, "thickness": 1, "alpha": 30, "color": "0xF50800" } }, // "E-75" E-75-Turm Ausf. A
{ "e_75": { "enabled": true, "distance": 400, "thickness": 1, "alpha": 60, "color": "0x7FDC00" } }, // "E-75" E-75-Turm Ausf. F
{ "vk4502p": { "enabled": true, "distance": 400, "thickness": 1, "alpha": 30, "color": "0xF50800" } }, // "VK4502P" VK-4502-(P)-Standardturm
{ "vk4502p": { "enabled": true, "distance": 400, "thickness": 1, "alpha": 60, "color": "0x7FDC00" } }, // "VK4502P" VK-4502-(P)-Eliteturm
{ "m103": { "enabled": true, "distance": 370, "thickness": 1, "alpha": 30, "color": "0xF50800" } }, // "M103" M89
{ "m103": { "enabled": true, "distance": 390, "thickness": 1, "alpha": 60, "color": "0x7FDC00" } }, // "M103" T140
{ "amx_50_120": { "enabled": true, "distance": 390, "thickness": 1, "alpha": 60, "color": "0x7FDC00" } }, // "AMX_50_120" AMX 50 Tourelle C
{ "gb12_conqueror": { "enabled": true, "distance": 400, "thickness": 1, "alpha": 30, "color": "0xF50800" } }, // "GB12_Conqueror" Centurion Mk. III
{ "gb12_conqueror": { "enabled": true, "distance": 400, "thickness": 1, "alpha": 60, "color": "0x7FDC00" } }, // "GB12_Conqueror" Conqueror Mk. II
{ "ch12_111_1_2_3": { "enabled": true, "distance": 380, "thickness": 1, "alpha": 30, "color": "0xF50800" } }, // "Ch12_111_1_2_3" IS-3
{ "ch12_111_1_2_3": { "enabled": true, "distance": 400, "thickness": 1, "alpha": 60, "color": "0x7FDC00" } }, // "Ch12_111_1_2_3" WZ-111
{ "object_704": { "enabled": true, "distance": 390, "thickness": 1, "alpha": 60, "color": "0x7FDC00" } }, // "Object_704" -
{ "su122_54": { "enabled": true, "distance": 390, "thickness": 1, "alpha": 60, "color": "0x7FDC00" } }, // "SU122_54" -
{ "jagdtiger": { "enabled": true, "distance": 390, "thickness": 1, "alpha": 60, "color": "0x7FDC00" } }, // "JagdTiger" -
{ "t30": { "enabled": true, "distance": 380, "thickness": 1, "alpha": 60, "color": "0x7FDC00" } }, // "T30" T30D1
{ "t95": { "enabled": true, "distance": 380, "thickness": 1, "alpha": 60, "color": "0x7FDC00" } }, // "T95" -
{ "amx50_foch": { "enabled": true, "distance": 390, "thickness": 1, "alpha": 60, "color": "0x7FDC00" } }, // "AMX50_Foch" -
// level 10
{ "t62a": { "enabled": true, "distance": 400, "thickness": 1, "alpha": 60, "color": "0x7FDC00" } }, // "T62A" Образца 1959 г.
{ "e50_ausf_m": { "enabled": true, "distance": 400, "thickness": 1, "alpha": 60, "color": "0x7FDC00" } }, // "E50_Ausf_M" E-50M-Turm Ausf. F
{ "m48a1": { "enabled": true, "distance": 420, "thickness": 1, "alpha": 60, "color": "0x7FDC00" } }, // "M48A1" M87
{ "bat_chatillon25t": { "enabled": true, "distance": 400, "thickness": 1, "alpha": 60, "color": "0x7FDC00" } }, // "Bat_Chatillon25t" Bat Chatillon 25 t Tourelle A
{ "gb70_fv4202_105": { "enabled": true, "distance": 410, "thickness": 1, "alpha": 60, "color": "0x7FDC00" } }, // "GB70_FV4202_105" FV4202
{ "ch19_121": { "enabled": true, "distance": 400, "thickness": 1, "alpha": 60, "color": "0x7FDC00" } }, // "Ch19_121" 121
{ "is_4": { "enabled": true, "distance": 400, "thickness": 1, "alpha": 60, "color": "0x7FDC00" } }, // "IS-4" об.701 №5
{ "is_7": { "enabled": true, "distance": 400, "thickness": 1, "alpha": 60, "color": "0x7FDC00" } }, // "IS-7" ИС-7
{ "e_100": { "enabled": true, "distance": 400, "thickness": 1, "alpha": 60, "color": "0x7FDC00" } }, // "E-100" E-100-Turm Ausf. B
{ "maus": { "enabled": true, "distance": 400, "thickness": 1, "alpha": 60, "color": "0x7FDC00" } }, // "Maus" Mausturm
{ "t110": { "enabled": true, "distance": 400, "thickness": 1, "alpha": 60, "color": "0x7FDC00" } }, // "T110" T53
{ "t57_58": { "enabled": true, "distance": 400, "thickness": 1, "alpha": 60, "color": "0x7FDC00" } }, // "T57_58" T169
{ "f10_amx_50b": { "enabled": true, "distance": 400, "thickness": 1, "alpha": 60, "color": "0x7FDC00" } }, // "F10_AMX_50B" AMX 50B
{ "gb13_fv215b": { "enabled": true, "distance": 410, "thickness": 1, "alpha": 60, "color": "0x7FDC00" } }, // "GB13_FV215b" FV215b
{ "ch22_113": { "enabled": true, "distance": 400, "thickness": 1, "alpha": 60, "color": "0x7FDC00" } }, // "Ch22_113" 113
{ "object263": { "enabled": true, "distance": 410, "thickness": 1, "alpha": 60, "color": "0x7FDC00" } }, // "Object263" -
{ "object268": { "enabled": true, "distance": 400, "thickness": 1, "alpha": 60, "color": "0x7FDC00" } }, // "Object268" -
{ "jagdpz_e100": { "enabled": true, "distance": 400, "thickness": 1, "alpha": 60, "color": "0x7FDC00" } }, // "JagdPz_E100" -
{ "t110e3": { "enabled": true, "distance": 400, "thickness": 1, "alpha": 60, "color": "0x7FDC00" } }, // "T110E3" -
{ "t110e4": { "enabled": true, "distance": 400, "thickness": 1, "alpha": 60, "color": "0x7FDC00" } }, // "T110E4" T110E4
{ "amx_50fosh_155": { "enabled": true, "distance": 400, "thickness": 1, "alpha": 60, "color": "0x7FDC00" } } // "AMX_50Fosh_155" -
]
},
"lines": { // Only for owned vehicle.
// Works only with xvm-stat.exe
"enabled": true,
// "inmeters": true - make line size to be in real map meters.
// "inmeters": false - make line size to be in minimap interface clip points. Minimap interface clip side is 210 points.
// Distance between farthest corners at 1km map is somewhat more than 1400 meters.
// Sections can contain any number of lines.
// To set a point try setting line with length of one and large thickness.
"vehicle": [ //tank facing direction.
{ "enabled": true, "from": 50, "to": 100, "inmeters": true, "thickness": 1, "alpha": 60, "color": "0x44EE44"}, // Turm max links nur TDs und SPGS
{ "enabled": false, "from": 150, "to": 400, "inmeters": true, "thickness": 1, "alpha": 45, "color": "0x44EE44"}, // Fahrzeug Mittellinie
{ "enabled": true, "from": 425, "to": 1414, "inmeters": true, "thickness": 1, "alpha": 30, "color": "0x44EE44"} // Turm max rechts nur TDs und SPGS
],
"camera": [ //Direction tank is aiming.
{ "enabled": true, "from": 50, "to": 390, "inmeters": true, "thickness": 1, "alpha": 80, "color": "0xFFFFFF"},
{ "enabled": true, "from": 400, "to": 406, "inmeters": true, "thickness": 2.4, "alpha": 100, "color": "0xffff00"},
{ "enabled": true, "from": 410, "to": 490, "inmeters": true, "thickness": 1, "alpha": 70, "color": "0xFFFFFF"}, //weiße Linie
{ "enabled": true, "from": 500, "to": 506, "inmeters": true, "thickness": 2.5, "alpha": 100, "color": "0x00EAFF"},
{ "enabled": true, "from": 500, "to": 506, "inmeters": true, "thickness": 3, "alpha": 100, "color": "0x000000"},
{ "enabled": true, "from": 510, "to": 590, "inmeters": true, "thickness": 1, "alpha": 70, "color": "0xFFFFFF"},
{ "enabled": true, "from": 600, "to": 606, "inmeters": true, "thickness": 2.5, "alpha": 100, "color": "0xFF00FF"}, //gellbe Linie
{ "enabled": true, "from": 610, "to": 1800,"inmeters": true, "thickness": 1, "alpha": 60, "color": "0xFFFFFF"}
],
// Gun traverse angles may differ depending on vehicle angle relative to ground
// See pics at [url=http://goo.gl/ZqlPa][[/url]
"traverseAngle": [ // Horizontal gun traverse angle lines for ATs and SPGs.
{ "enabled": true, "from": 50, "to": 95, "inmeters": true, "thickness": 1.5, "alpha": 60, "color": "0xF50800"},
{ "enabled": true, "from": 100, "to": 145, "inmeters": true, "thickness": 1.4, "alpha": 60, "color": "0xF50800"},
{ "enabled": true, "from": 150, "to": 196, "inmeters": true, "thickness": 1.3, "alpha": 60, "color": "0xF50800"},
{ "enabled": true, "from": 200, "to": 246, "inmeters": true, "thickness": 1.2, "alpha": 60, "color": "0xF50800"},
{ "enabled": true, "from": 250, "to": 296, "inmeters": true, "thickness": 1.1, "alpha": 60, "color": "0xF50800"},
{ "enabled": true, "from": 300, "to": 397, "inmeters": true, "thickness": 1, "alpha": 60, "color": "0xF50800"},
{ "enabled": true, "from": 400, "to": 497, "inmeters": true, "thickness": 0.9, "alpha": 60, "color": "0xFFFF00"},
{ "enabled": true, "from": 500, "to": 2000,"inmeters": true, "thickness": 0.75, "alpha": 50, "color": "0xF50800"}
]
}
},
"consts": {
"AVG_EFF": 900,
"AVG_BATTLES": 1000,
"E": {
"SPG": [
{
"CD": 2,
"CF": 1,
"CS": 0
},
{
"CD": 2,
"CF": 1,
"CS": 0
},
{
"CD": 2,
"CF": 1,
"CS": 0
},
{
"CD": 2,
"CF": 1,
"CS": 0
},
{
"CD": 2,
"CF": 1,
"CS": 0
},
{
"CD": 2,
"CF": 1,
"CS": 0
},
{
"CD": 2,
"CF": 1,
"CS": 0
},
{
"CD": 2,
"CF": 1,
"CS": 0
},
{
"CD": 2,
"CF": 1,
"CS": 0
},
{
"CD": 2,
"CF": 1,
"CS": 0
}
],
"MT": [
{
"CD": 4,
"CF": 1,
"CS": 2
},
{
"CD": 4,
"CF": 1,
"CS": 2
},
{
"CD": 4,
"CF": 1,
"CS": 2
},
{
"CD": 4,
"CF": 1,
"CS": 2
},
{
"CD": 4,
"CF": 1,
"CS": 2
},
{
"CD": 4,
"CF": 1,
"CS": 2
},
{
"CD": 4,
"CF": 1,
"CS": 2
},
{
"CD": 4,
"CF": 1,
"CS": 2
},
{
"CD": 4,
"CF": 1,
"CS": 2
},
{
"CD": 4,
"CF": 1,
"CS": 2
}
],
"TD": [
{
"CD": 3,
"CF": 2,
"CS": 1
},
{
"CD": 3,
"CF": 2,
"CS": 1
},
{
"CD": 3,
"CF": 2,
"CS": 1
},
{
"CD": 3,
"CF": 2,
"CS": 1
},
{
"CD": 3,
"CF": 2,
"CS": 1
},
{
"CD": 3,
"CF": 2,
"CS": 1
},
{
"CD": 3,
"CF": 2,
"CS": 1
},
{
"CD": 3,
"CF": 2,
"CS": 1
},
{
"CD": 3,
"CF": 2,
"CS": 1
},
{
"CD": 3,
"CF": 2,
"CS": 1
}
],
"HT": [
{
"CD": 4,
"CF": 2,
"CS": 1
},
{
"CD": 4,
"CF": 2,
"CS": 1
},
{
"CD": 4,
"CF": 2,
"CS": 1
},
{
"CD": 4,
"CF": 2,
"CS": 1
},
{
"CD": 4,
"CF": 2,
"CS": 1
},
{
"CD": 4,
"CF": 2,
"CS": 1
},
{
"CD": 4,
"CF": 2,
"CS": 1
},
{
"CD": 4,
"CF": 2,
"CS": 1
},
{
"CD": 4,
"CF": 2,
"CS": 1
},
{
"CD": 4,
"CF": 2,
"CS": 1
}
],
"LT": [
{
"CD": 1,
"CF": 1,
"CS": 1
},
{
"CD": 1,
"CF": 1,
"CS": 1
},
{
"CD": 1,
"CF": 1,
"CS": 1
},
{
"CD": 1,
"CF": 1,
"CS": 1
},
{
"CD": 1,
"CF": 1,
"CS": 3
},
{
"CD": 1,
"CF": 1,
"CS": 3
},
{
"CD": 1,
"CF": 1,
"CS": 3
},
{
"CD": 1,
"CF": 1,
"CS": 3
},
{
"CD": 1,
"CF": 1,
"CS": 3
},
{
"CD": 1,
"CF": 1,
"CS": 3
}
]
},
"AVG_GWR": 48
},
// OVER-TARGET MARKERS
"markers": {
// Ally
"ally": {
// Ally - alive
"alive": {
// Ally - alive - normal mode (without 'Alt')
"normal": {
"vehicleIcon": { // "Type of vehicle" icon (HT / MT / LT / TD / Arty)
"visible": true, // false - Disable
"showSpeaker": false, // true - Show speaker even if visible=false
"x": 0, // Position on the X axis
"y": -16, // Position on the Y axis
"alpha": 100, // Opacity
"color": null, // Color (currently not in use)
"maxScale": 100, // Maximum scale (default is 100)
"scaleX": 0, // Offset along the X axis (?)
"scaleY": 16, // Offset along the Y axis (?)
"shadow": { // Shadow options
"alpha": 100, // Opacity
"color": "0x000000", // Color
"angle": 45, // Offset angle
"distance": 0, // Offset distance
"size": 6, // Size
"strength": 200 // Intensity
}
},
"healthBar": { // Health indicator
"visible": true, // false - Disable
"x": -41, // Position on the X axis
"y": -33, // Position on the Y axis
"alpha": 100, // Opacity (dynamic transparency allowed, see readme-en.txt)
"color": null, // Primary color (dynamic colors allowed, see readme-en.txt)
"lcolor": null, // Optional color (for the gradient)
"width": 80, // Width of health bar
"height": 12, // Height of health bar
"border": { // Options for substrate and border
"alpha": 30, // Opacity
"color": "0x000000", // Color
"size": 1 // Border size
},
"fill": { // Options for remaining health
"alpha": 30 // Opacity
}, //
"damage": { // Options for animation of health loss
"alpha": 80, // Opacity
"color": null, // Color
"fade": 1 // Fade time in seconds
}
},
"damageText": { // Floating damage values
"visible": true, // false - Disable
"x": 0, // Position on the X axis
"y": -67, // Position on the Y axis
"alpha": 100, // Opacity (dynamic transparency allowed, see readme-en.txt)
"color": null, // Color (dynamic colors allowed, see readme-en.txt)
"font": { // Font options
"name": "$FieldFont", // Font name
"size": 18, // Font size
"align": "center", // Text alignment (left, center, right)
"bold": false, // Normal (false) or bold (true)
"italic": false // Normal (false) or italic (true)
},
"shadow": { // Shadow options
"alpha": 100, // Opacity
"color": "0x000000", // Color
"angle": 45, // Offset angle
"distance": 0, // Offset distance
"size": 6, // Size
"strength": 200 // Intensity
},
"speed": 2, // Rising speed of displayed damage (float up speed)
"maxRange": 40, // Maximimum distance of target for which damage rises
"damageMessage": "{{dmg}}", // Text for normal damage (see description of macros in the readme-en.txt)
"blowupMessage": "* boing! *" // Text for ammo rack explosion (see description of macros in the readme-en.txt)
},
"contourIcon": { // Vehicle icon
"visible": false, // false - Disable
"x": 6, // Position on the X axis
"y": -65, // Position on the Y axis
"alpha": 100, // Opacity (dynamic transparency allowed, see readme-en.txt)
"color": null, // Color (dynamic colors allowed, see readme-en.txt)
"amount": 0 // Color intensity from 0 to 100. The default is 0 (off).
},
"clanIcon": { // Player/clan icon
"visible": false, // false - Disable
"x": 0, // Position on the X axis
"y": -67, // Position on the Y axis
"w": 16, // Width
"h": 16, // Height
"alpha": 100 // Opacity (dynamic transparency allowed, see readme-en.txt)
},
"levelIcon": { // Vehicle tier
"visible": false, // false - Disable
"x": 0, // Position on the X axis
"y": -21, // Position on the Y axis
"alpha": 100 // Opacity
},
"actionMarker": { // Markers "Help!" and "Attack!"
"visible": true, // false - Disable
"x": 0, // Position on the X axis
"y": -67, // Position on the Y axis
"alpha": 100 // Opacity
},
// Block of text fields
"textFields": [
// Text field with the name of the tank
{
"visible": true, // false - Disable
"x": 0, // Position on the X axis
"y": -36, // Position on the Y axis
"alpha": 100, // Opacity (dynamic transparency allowed, see readme-en.txt)
"color": null, // Color (dynamic colors allowed, see readme-en.txt)
"font": { // Font options
"name": "$FieldFont", // Font name
"size": 13, // Font size
"align": "center", // Text alignment (left, center, right)
"bold": false, // Normal (false) or bold (true)
"italic": false // Normal (false) or italic (true)
},
"shadow": { // Shadow options
"alpha": 100, // Opacity
"color": "0x000000", // Color
"angle": 45, // Offset angle
"distance": 0, // Offset distance
"size": 6, // Size
"strength": 200 // Intensity
},
"format": "{{vehicle}}{{turret}}" // Text format (see description of macros in the readme-en.txt)
},
// Text field with the remaining / maximum health
{
"visible": true, // false - Disable
"x": 0, // Position on the X axis
"y": -20, // Position on the Y axis
"alpha": 100, // Opacity (dynamic transparency allowed, see readme-en.txt)
"color": "0xFCFCFC", // Color (dynamic colors allowed, see readme-en.txt)
"font": { // Font options
"name": "$FieldFont", // Font name
"size": 11, // Font size
"align": "center", // Text alignment (left, center, right)
"bold": true, // Normal (false) or bold (true)
"italic": false // Normal (false) or italic (true)
},
"shadow": { // Shadow options
"alpha": 100, // Opacity
"color": "0x000000", // Color
"angle": 45, // Offset angle
"distance": 0, // Offset distance
"size": 4, // Size
"strength": 100 // Intensity
},
"format": "{{hp}} / {{hp-max}}" // Text format (see description of macros in the readme-en.txt)
}
]
},
// Ally - alive - alternative mode (pressing 'Alt')
"extended": {
"vehicleIcon": { // "Type of vehicle" icon (HT / MT / LT / TD / Arty)
"visible": true, // false - Disable
"showSpeaker": false, // true - Show speaker even if visible=false
"x": 0, // Position on the X axis
"y": -16, // Position on the Y axis
"alpha": 100, // Opacity
"color": null, // Color (currently not in use)
"maxScale": 100, // Maximum scale (default is 100)
"scaleX": 0, // Offset along the X axis (?)
"scaleY": 16, // Offset along the Y axis (?)
"shadow": { // Shadow options
"alpha": 100, // Opacity
"color": "0x000000", // Color
"angle": 45, // Offset angle
"distance": 0, // Offset distance
"size": 6, // Size
"strength": 200 // Intensity
}
},
"healthBar": { // Health indicator
"visible": true, // false - Disable
"x": -41, // Position on the X axis
"y": -33, // Position on the Y axis
"alpha": 100, // Opacity (dynamic transparency allowed, see readme-en.txt)
"color": null, // Primary color (dynamic colors allowed, see readme-en.txt)
"lcolor": null, // Optional color (for the gradient)
"width": 80, // Width of health bar
"height": 12, // Height of health bar
"border": { // Options for substrate and border
"alpha": 30, // Opacity
"color": "0x000000", // Color
"size": 1 // Border size
},
"fill": { // Options for remaining health
"alpha": 30 // Opacity
}, //
"damage": { // Options for animation of health loss
"alpha": 80, // Opacity
"color": null, // Color
"fade": 1 // Fade time in seconds
}
},
"damageText": { // Floating damage values
"visible": true, // false - Disable
"x": 0, // Position on the X axis
"y": -67, // Position on the Y axis
"alpha": 100, // Opacity (dynamic transparency allowed, see readme-en.txt)
"color": null, // Color (dynamic colors allowed, see readme-en.txt)
"font": { // Font options
"name": "$FieldFont", // Font name
"size": 18, // Font size
"align": "center", // Text alignment (left, center, right)
"bold": false, // Normal (false) or bold (true)
"italic": false // Normal (false) or italic (true)
},
"shadow": { // Shadow options
"alpha": 100, // Opacity
"color": "0x000000", // Color
"angle": 45, // Offset angle
"distance": 0, // Offset distance
"size": 6, // Size
"strength": 200 // Intensity
},
"speed": 2, // Rising speed of displayed damage (float up speed)
"maxRange": 40, // Maximimum distance of target for which damage rises
"damageMessage": "{{dmg}}", // Text for normal damage (see description of macros in the readme-en.txt)
"blowupMessage": "* boing! *" // Text for ammo rack explosion (see description of macros in the readme-en.txt)
},
"contourIcon": { // Vehicle icon
"visible": false, // false - Disable
"x": 6, // Position on the X axis
"y": -65, // Position on the Y axis
"alpha": 100, // Opacity (dynamic transparency allowed, see readme-en.txt)
"color": null, // Color (dynamic colors allowed, see readme-en.txt)
"amount": 0 // Color intensity from 0 to 100. The default is 0 (off).
},
"clanIcon": { // Player/clan icon
"visible": false, // false - Disable
"x": 0, // Position on the X axis
"y": -67, // Position on the Y axis
"w": 16, // Width
"h": 16, // Height
"alpha": 100 // Opacity (dynamic transparency allowed, see readme-en.txt)
},
"levelIcon": { // Vehicle tier
"visible": false, // false - Disable
"x": 0, // Position on the X axis
"y": -21, // Position on the Y axis
"alpha": 100 // Opacity
},
"actionMarker": { // Markers "Help!" and "Attack!"
"visible": true, // false - Disable
"x": 0, // Position on the X axis
"y": -67, // Position on the Y axis
"alpha": 100 // Opacity
},
// Block of text fields
"textFields": [
// Text field with the name of the player
{
"visible": true, // false - Disable
"x": 0, // Position on the X axis
"y": -36, // Position on the Y axis
"alpha": 100, // Opacity (dynamic transparency allowed, see readme-en.txt)
"color": null, // Color (dynamic colors allowed, see readme-en.txt)
"font": { // Font options
"name": "$FieldFont", // Font name
"size": 13, // Font size
"align": "center", // Text alignment (left, center, right)
"bold": false, // Normal (false) or bold (true)
"italic": false // Normal (false) or italic (true)
},
"shadow": { // Shadow options
"alpha": 100, // Opacity
"color": "0x000000", // Color
"angle": 45, // Offset angle
"distance": 0, // Offset distance
"size": 6, // Size
"strength": 200 // Intensity
},
"format": "{{nick}}" // Text format (see description of macros in the readme-en.txt)
},
// Text field with the percentage of remaining health
{
"visible": true, // false - Disable
"x": 0, // Position on the X axis
"y": -20, // Position on the Y axis
"alpha": 100, // Opacity (dynamic transparency allowed, see readme-en.txt)
"color": "0xFCFCFC", // Color (dynamic colors allowed, see readme-en.txt)
"font": { // Font options
"name": "$FieldFont", // Font name
"size": 11, // Font size
"align": "center", // Text alignment (left, center, right)
"bold": true, // Normal (false) or bold (true)
"italic": false // Normal (false) or italic (true)
},
"shadow": { // Shadow options
"alpha": 100, // Opacity
"color": "0x000000", // Color
"angle": 45, // Offset angle
"distance": 0, // Offset distance
"size": 4, // Size
"strength": 100 // Intensity
},
// Percent symbol - \u0025
"format": "{{hp-ratio}}\u0025" // Text format (see description of macros in the readme-en.txt)
},
// Text field with win ratio
{
"name": "Global Win Rate",
"visible": true,
"x": 0,
"y": -46,
"alpha": 100,
"color": "{{c:rating}}",
"font": {
"name": "$FieldFont",
"size": 11,
"align": "center",
"bold": true,
"italic": false
},
"shadow": {
"alpha": 100,
"color": "0x000000",
"angle": 45,
"distance": 0,
"size": 6,
"strength": 200
},
"format": "{{rating}}"
}
]
}
},
// Ally - dead
"dead": {
// Ally - dead - normal mode (without 'Alt')
"normal": {
"vehicleIcon": { // "Type of vehicle" icon (HT / MT / LT / TD / Arty)
"visible": true, // false - Disable
"showSpeaker": false, // true - Show speaker even if visible=false
"x": 0, // Position on the X axis
"y": -16, // Position on the Y axis
"alpha": 100, // Opacity
"color": null, // Color (currently not in use)
"maxScale": 100, // Maximum scale (default is 100)
"scaleX": 0, // Offset along the X axis (?)
"scaleY": 16, // Offset along the Y axis (?)
"shadow": { // Shadow options
"alpha": 100, // Opacity
"color": "0x000000", // Color
"angle": 45, // Offset angle
"distance": 0, // Offset distance
"size": 6, // Size
"strength": 200 // Intensity
}
},
"healthBar": { // Health indicator
"visible": false, // false - Disable
"x": -41, // Position on the X axis
"y": -33, // Position on the Y axis
"alpha": 100, // Opacity (dynamic transparency allowed, see readme-en.txt)
"color": null, // Primary color (dynamic colors allowed, see readme-en.txt)
"lcolor": null, // Optional color (for the gradient)
"width": 80, // Width of health bar
"height": 12, // Height of health bar
"border": { // Options for substrate and border
"alpha": 30, // Opacity
"color": "0x000000", // Color
"size": 1 // Border size
},
"fill": { // Options for remaining health
"alpha": 30 // Opacity
}, //
"damage": { // Options for animation of health loss
"alpha": 80, // Opacity
"color": null, // Color
"fade": 1 // Fade time in seconds
}
},
"damageText": { // Floating damage values
"visible": true, // false - Disable
"x": 0, // Position on the X axis
"y": -67, // Position on the Y axis
"alpha": 100, // Opacity (dynamic transparency allowed, see readme-en.txt)
"color": null, // Color (dynamic colors allowed, see readme-en.txt)
"font": { // Font options
"name": "$FieldFont", // Font name
"size": 18, // Font size
"align": "center", // Text alignment (left, center, right)
"bold": false, // Normal (false) or bold (true)
"italic": false // Normal (false) or italic (true)
},
"shadow": { // Shadow options
"alpha": 100, // Opacity
"color": "0x000000", // Color
"angle": 45, // Offset angle
"distance": 0, // Offset distance
"size": 6, // Size
"strength": 200 // Intensity
},
"speed": 2, // Rising speed of displayed damage (float up speed)
"maxRange": 40, // Maximimum distance of target for which damage rises
"damageMessage": "{{dmg}}", // Text for normal damage (see description of macros in the readme-en.txt)
"blowupMessage": "* boing! *" // Text for ammo rack explosion (see description of macros in the readme-en.txt)
},
"contourIcon": { // Vehicle icon
"visible": false, // false - Disable
"x": 6, // Position on the X axis
"y": -65, // Position on the Y axis
"alpha": 100, // Opacity (dynamic transparency allowed, see readme-en.txt)
"color": null, // Color (dynamic colors allowed, see readme-en.txt)
"amount": 0 // Color intensity from 0 to 100. The default is 0 (off).
},
"clanIcon": { // Player/clan icon
"visible": false, // false - Disable
"x": 0, // Position on the X axis
"y": -67, // Position on the Y axis
"w": 16, // Width
"h": 16, // Height
"alpha": 100 // Opacity (dynamic transparency allowed, see readme-en.txt)
},
"levelIcon": { // Vehicle tier
"visible": false, // false - Disable
"x": 0, // Position on the X axis
"y": -21, // Position on the Y axis
"alpha": 100 // Opacity
},
"actionMarker": { // Markers "Help!" and "Attack!"
"visible": true, // false - Disable
"x": 0, // Position on the X axis
"y": -67, // Position on the Y axis
"alpha": 100 // Opacity
},
// Block of text fields
"textFields": [ ] // Disable text in this mode
},
// Ally - dead - alternative mode (pressing 'Alt')
"extended": {
"vehicleIcon": { // "Type of vehicle" icon (HT / MT / LT / TD / Arty)
"visible": true, // false - Disable
"showSpeaker": false, // true - Show speaker even if visible=false
"x": 0, // Position on the X axis
"y": -16, // Position on the Y axis
"alpha": 100, // Opacity
"color": null, // Color (currently not in use)
"maxScale": 100, // Maximum scale (default is 100)
"scaleX": 0, // Offset along the X axis (?)
"scaleY": 16, // Offset along the Y axis (?)
"shadow": { // Shadow options
"alpha": 100, // Opacity
"color": "0x000000", // Color
"angle": 45, // Offset angle
"distance": 0, // Offset distance
"size": 6, // Size
"strength": 200 // Intensity
}
},
"healthBar": { // Health indicator
"visible": false, // false - Disable
"x": -41, // Position on the X axis
"y": -33, // Position on the Y axis
"alpha": 100, // Opacity (dynamic transparency allowed, see readme-en.txt)
"color": null, // Primary color (dynamic colors allowed, see readme-en.txt)
"lcolor": null, // Optional color (for the gradient)
"width": 80, // Width of health bar
"height": 12, // Height of health bar
"border": { // Options for substrate and border
"alpha": 30, // Opacity
"color": "0x000000", // Color
"size": 1 // Border size
},
"fill": { // Options for remaining health
"alpha": 30 // Opacity
}, //
"damage": { // Options for animation of health loss
"alpha": 80, // Opacity
"color": null, // Color
"fade": 1 // Fade time in seconds
}
},
"damageText": { // Floating damage values
"visible": true, // false - Disable
"x": 0, // Position on the X axis
"y": -67, // Position on the Y axis
"alpha": 100, // Opacity (dynamic transparency allowed, see readme-en.txt)
"color": null, // Color (dynamic colors allowed, see readme-en.txt)
"font": { // Font options
"name": "$FieldFont", // Font name
"size": 18, // Font size
"align": "center", // Text alignment (left, center, right)
"bold": false, // Normal (false) or bold (true)
"italic": false // Normal (false) or italic (true)
},
"shadow": { // Shadow options
"alpha": 100, // Opacity
"color": "0x000000", // Color
"angle": 45, // Offset angle
"distance": 0, // Offset distance
"size": 6, // Size
"strength": 200 // Intensity
},
"speed": 2, // Rising speed of displayed damage (float up speed)
"maxRange": 40, // Maximimum distance of target for which damage rises
"damageMessage": "{{dmg}}", // Text for normal damage (see description of macros in the readme-en.txt)
"blowupMessage": "* boing! *" // Text for ammo rack explosion (see description of macros in the readme-en.txt)
},
"contourIcon": { // Vehicle icon
"visible": false, // false - Disable
"x": 6, // Position on the X axis
"y": -65, // Position on the Y axis
"alpha": 100, // Opacity (dynamic transparency allowed, see readme-en.txt)
"color": null, // Color (dynamic colors allowed, see readme-en.txt)
"amount": 0 // Color intensity from 0 to 100. The default is 0 (off).
},
"clanIcon": { // Player/clan icon
"visible": false, // false - Disable
"x": 0, // Position on the X axis
"y": -67, // Position on the Y axis
"w": 16, // Width
"h": 16, // Height
"alpha": 100 // Opacity (dynamic transparency allowed, see readme-en.txt)
},
"levelIcon": { // Vehicle tier
"visible": false, // false - Disable
"x": 0, // Position on the X axis
"y": -21, // Position on the Y axis
"alpha": 100 // Opacity
},
"actionMarker": { // Markers "Help!" and "Attack!"
"visible": true, // false - Disable
"x": 0, // Position on the X axis
"y": -67, // Position on the Y axis
"alpha": 100 // Opacity
},
// Block of text fields
"textFields": [
// Text field with the name of the player
{
"visible": true, // false - Disable
"x": 0, // Position on the X axis
"y": -34, // Position on the Y axis
"alpha": 80, // Opacity (dynamic transparency allowed, see readme-en.txt)
"color": null, // Color (dynamic colors allowed, see readme-en.txt)
"font": { // Font options
"name": "$FieldFont", // Font name
"size": 13, // Font size
"align": "center", // Text alignment (left, center, right)
"bold": false, // Normal (false) or bold (true)
"italic": false // Normal (false) or italic (true)
},
"shadow": { // Shadow options
"alpha": 100, // Opacity
"color": "0x000000", // Color
"angle": 45, // Offset angle
"distance": 0, // Offset distance
"size": 6, // Size
"strength": 200 // Intensity
},
"format": "{{nick}}" // Text format (see description of macros in the readme-en.txt)
},
// Text field with the name of the tank
{
"visible": true, // false - Disable
"x": 0, // Position on the X axis
"y": -20, // Position on the Y axis
"alpha": 80, // Opacity (dynamic transparency allowed, see readme-en.txt)
"color": null, // Color (dynamic colors allowed, see readme-en.txt)
"font": { // Font options
"name": "$FieldFont", // Font name
"size": 13, // Font size
"align": "center", // Text alignment (left, center, right)
"bold": false, // Normal (false) or bold (true)
"italic": false // Normal (false) or italic (true)
},
"shadow": { // Shadow options
"alpha": 100, // Opacity
"color": "0x000000", // Color
"angle": 45, // Offset angle
"distance": 0, // Offset distance
"size": 6, // Size
"strength": 200 // Intensity
},
"format": "{{vehicle}}" // Text format (see description of macros in the readme-en.txt)
}
]
}
}
},
// Enemy
"enemy": {
// Enemy - alive
"alive": {
// Enemy - alive - normal mode (without 'Alt')
"normal": {
"vehicleIcon": { // "Type of vehicle" icon (HT / MT / LT / TD / Arty)
"visible": true, // false - Disable
"showSpeaker": false, // true - Show speaker even if visible=false
"x": 0, // Position on the X axis
"y": -16, // Position on the Y axis
"alpha": 100, // Opacity
"color": null, // Color (currently not in use)
"maxScale": 100, // Maximum scale (default is 100)
"scaleX": 0, // Offset along the X axis (?)
"scaleY": 16, // Offset along the Y axis (?)
"shadow": { // Shadow options
"alpha": 100, // Opacity
"color": "0x000000", // Color
"angle": 45, // Offset angle
"distance": 0, // Offset distance
"size": 6, // Size
"strength": 200 // Intensity
}
},
"healthBar": { // Health indicator
"visible": true, // false - Disable
"x": -41, // Position on the X axis
"y": -33, // Position on the Y axis
"alpha": 100, // Opacity (dynamic transparency allowed, see readme-en.txt)
"color": null, // Primary color (dynamic colors allowed, see readme-en.txt)
"lcolor": null, // Optional color (for the gradient)
"width": 80, // Width of health bar
"height": 12, // Height of health bar
"border": { // Options for substrate and border
"alpha": 30, // Opacity
"color": "0x000000", // Color
"size": 1 // Border size
},
"fill": { // Options for remaining health
"alpha": 30 // Opacity
}, //
"damage": { // Options for animation of health loss
"alpha": 80, // Opacity
"color": null, // Color
"fade": 1 // Fade time in seconds
}
},
"damageText": { // Floating damage values
"visible": true, // false - Disable
"x": 0, // Position on the X axis
"y": -67, // Position on the Y axis
"alpha": 100, // Opacity (dynamic transparency allowed, see readme-en.txt)
"color": null, // Color (dynamic colors allowed, see readme-en.txt)
"font": { // Font options
"name": "$FieldFont", // Font name
"size": 18, // Font size
"align": "center", // Text alignment (left, center, right)
"bold": false, // Normal (false) or bold (true)
"italic": false // Normal (false) or italic (true)
},
"shadow": { // Shadow options
"alpha": 100, // Opacity
"color": "0x000000", // Color
"angle": 45, // Offset angle
"distance": 0, // Offset distance
"size": 6, // Size
"strength": 200 // Intensity
},
"speed": 2, // Rising speed of displayed damage (float up speed)
"maxRange": 40, // Maximimum distance of target for which damage rises
"damageMessage": "{{dmg}}", // Text for normal damage (see description of macros in the readme-en.txt)
"blowupMessage": "* boing! *" // Text for ammo rack explosion (see description of macros in the readme-en.txt)
},
"contourIcon": { // Vehicle icon
"visible": false, // false - Disable
"x": 6, // Position on the X axis
"y": -65, // Position on the Y axis
"alpha": 100, // Opacity (dynamic transparency allowed, see readme-en.txt)
"color": null, // Color (dynamic colors allowed, see readme-en.txt)
"amount": 0 // Color intensity from 0 to 100. The default is 0 (off).
},
"clanIcon": { // Player/clan icon
"visible": false, // false - Disable
"x": 0, // Position on the X axis
"y": -67, // Position on the Y axis
"w": 16, // Width
"h": 16, // Height
"alpha": 100 // Opacity (dynamic transparency allowed, see readme-en.txt)
},
"levelIcon": { // Vehicle tier
"visible": false, // false - Disable
"x": 0, // Position on the X axis
"y": -21, // Position on the Y axis
"alpha": 100 // Opacity
},
"actionMarker": { // Markers "Help!" and "Attack!"
"visible": true, // false - Disable
"x": 0, // Position on the X axis
"y": -67, // Position on the Y axis
"alpha": 100 // Opacity
},
// Block of text fields
"textFields": [
// Text field with the name of the tank
{
"visible": true, // false - Disable
"x": 0, // Position on the X axis
"y": -36, // Position on the Y axis
"alpha": 100, // Opacity (dynamic transparency allowed, see readme-en.txt)
"color": null, // Color (dynamic colors allowed, see readme-en.txt)
"font": { // Font options
"name": "$FieldFont", // Font name
"size": 13, // Font size
"align": "center", // Text alignment (left, center, right)
"bold": false, // Normal (false) or bold (true)
"italic": false // Normal (false) or italic (true)
},
"shadow": { // Shadow options
"alpha": 100, // Opacity
"color": "0x000000", // Color
"angle": 45, // Offset angle
"distance": 0, // Offset distance
"size": 6, // Size
"strength": 200 // Intensity
},
"format": "{{vehicle}}{{turret}}" // Text format (see description of macros in the readme-en.txt)
},
// Text field with the remaining / maximum health
{
"visible": true, // false - Disable
"x": 0, // Position on the X axis
"y": -20, // Position on the Y axis
"alpha": 100, // Opacity (dynamic transparency allowed, see readme-en.txt)
"color": "0xFCFCFC", // Color (dynamic colors allowed, see readme-en.txt)
"font": { // Font options
"name": "$FieldFont", // Font name
"size": 11, // Font size
"align": "center", // Text alignment (left, center, right)
"bold": true, // Normal (false) or bold (true)
"italic": false // Normal (false) or italic (true)
},
"shadow": { // Shadow options
"alpha": 100, // Opacity
"color": "0x000000", // Color
"angle": 45, // Offset angle
"distance": 0, // Offset distance
"size": 4, // Size
"strength": 100 // Intensity
},
"format": "{{hp}} / {{hp-max}}" // Text format (see description of macros in the readme-en.txt)
}
]
},
// Enemy - alive - alternative mode (pressing 'Alt')
"extended": {
"vehicleIcon": { // "Type of vehicle" icon (HT / MT / LT / TD / Arty)
"visible": true, // false - Disable
"showSpeaker": false, // true - Show speaker even if visible=false
"x": 0, // Position on the X axis
"y": -16, // Position on the Y axis
"alpha": 100, // Opacity
"color": null, // Color (currently not in use)
"maxScale": 100, // Maximum scale (default is 100)
"scaleX": 0, // Offset along the X axis (?)
"scaleY": 16, // Offset along the Y axis (?)
"shadow": { // Shadow options
"alpha": 100, // Opacity
"color": "0x000000", // Color
"angle": 45, // Offset angle
"distance": 0, // Offset distance
"size": 6, // Size
"strength": 200 // Intensity
}
},
"healthBar": { // Health indicator
"visible": true, // false - Disable
"x": -41, // Position on the X axis
"y": -33, // Position on the Y axis
"alpha": 100, // Opacity (dynamic transparency allowed, see readme-en.txt)
"color": null, // Primary color (dynamic colors allowed, see readme-en.txt)
"lcolor": null, // Optional color (for the gradient)
"width": 80, // Width of health bar
"height": 12, // Height of health bar
"border": { // Options for substrate and border
"alpha": 30, // Opacity
"color": "0x000000", // Color
"size": 1 // Border size
},
"fill": { // Options for remaining health
"alpha": 30 // Opacity
}, //
"damage": { // Options for animation of health loss
"alpha": 80, // Opacity
"color": null, // Color
"fade": 1 // Fade time in seconds
}
},
"damageText": { // Floating damage values
"visible": true, // false - Disable
"x": 0, // Position on the X axis
"y": -67, // Position on the Y axis
"alpha": 100, // Opacity (dynamic transparency allowed, see readme-en.txt)
"color": null, // Color (dynamic colors allowed, see readme-en.txt)
"font": { // Font options
"name": "$FieldFont", // Font name
"size": 18, // Font size
"align": "center", // Text alignment (left, center, right)
"bold": false, // Normal (false) or bold (true)
"italic": false // Normal (false) or italic (true)
},
"shadow": { // Shadow options
"alpha": 100, // Opacity
"color": "0x000000", // Color
"angle": 45, // Offset angle
"distance": 0, // Offset distance
"size": 6, // Size
"strength": 200 // Intensity
},
"speed": 2, // Rising speed of displayed damage (float up speed)
"maxRange": 40, // Maximimum distance of target for which damage rises
"damageMessage": "{{dmg}}", // Text for normal damage (see description of macros in the readme-en.txt)
"blowupMessage": "* boing! *" // Text for ammo rack explosion (see description of macros in the readme-en.txt)
},
"contourIcon": { // Vehicle icon
"visible": false, // false - Disable
"x": 6, // Position on the X axis
"y": -65, // Position on the Y axis
"alpha": 100, // Opacity (dynamic transparency allowed, see readme-en.txt)
"color": null, // Color (dynamic colors allowed, see readme-en.txt)
"amount": 0 // Color intensity from 0 to 100. The default is 0 (off).
},
"clanIcon": { // Player/clan icon
"visible": false, // false - Disable
"x": 0, // Position on the X axis
"y": -67, // Position on the Y axis
"w": 16, // Width
"h": 16, // Height
"alpha": 100 // Opacity (dynamic transparency allowed, see readme-en.txt)
},
"levelIcon": { // Vehicle tier
"visible": false, // false - Disable
"x": 0, // Position on the X axis
"y": -21, // Position on the Y axis
"alpha": 100 // Opacity
},
"actionMarker": { // Markers "Help!" and "Attack!"
"visible": true, // false - Disable
"x": 0, // Position on the X axis
"y": -67, // Position on the Y axis
"alpha": 100 // Opacity
},
// Block of text fields
"textFields": [
// Text field with the name of the player
{
"visible": true, // false - Disable
"x": 0, // Position on the X axis
"y": -36, // Position on the Y axis
"alpha": 100, // Opacity (dynamic transparency allowed, see readme-en.txt)
"color": null, // Color (dynamic colors allowed, see readme-en.txt)
"font": { // Font options
"name": "$FieldFont", // Font name
"size": 13, // Font size
"align": "center", // Text alignment (left, center, right)
"bold": false, // Normal (false) or bold (true)
"italic": false // Normal (false) or italic (true)
},
"shadow": { // Shadow options
"alpha": 100, // Opacity
"color": "0x000000", // Color
"angle": 45, // Offset angle
"distance": 0, // Offset distance
"size": 6, // Size
"strength": 200 // Intensity
},
"format": "{{nick}}" // Text format (see description of macros in the readme-en.txt)
},
// Text field with the percentage of remaining health
{
"visible": true, // false - Disable
"x": 0, // Position on the X axis
"y": -20, // Position on the Y axis
"alpha": 100, // Opacity (dynamic transparency allowed, see readme-en.txt)
"color": "0xFCFCFC", // Color (dynamic colors allowed, see readme-en.txt)
"font": { // Font options
"name": "$FieldFont", // Font name
"size": 11, // Font size
"align": "center", // Text alignment (left, center, right)
"bold": true, // Normal (false) or bold (true)
"italic": false // Normal (false) or italic (true)
},
"shadow": { // Shadow options
"alpha": 100, // Opacity
"color": "0x000000", // Color
"angle": 45, // Offset angle
"distance": 0, // Offset distance
"size": 4, // Size
"strength": 100 // Intensity
},
// Percent symbol - \u0025
"format": "{{hp-ratio}}\u0025" // Text format (see description of macros in the readme-en.txt)
},
// Text field with win ratio
{
"name": "Global Win Rate",
"visible": true,
"x": 0,
"y": -46,
"alpha": 100,
"color": "{{c:rating}}",
"font": {
"name": "$FieldFont",
"size": 11,
"align": "center",
"bold": true,
"italic": false
},
"shadow": {
"alpha": 100,
"color": "0x000000",
"angle": 45,
"distance": 0,
"size": 6,
"strength": 200
},
"format": "{{rating}}"
}
]
}
},
// Enemy - dead
"dead": {
// Enemy - dead - normal mode (without 'Alt')
"normal": {
"vehicleIcon": { // "Type of vehicle" icon (HT / MT / LT / TD / Arty)
"visible": true, // false - Disable
"showSpeaker": false, // true - Show speaker even if visible=false
"x": 0, // Position on the X axis
"y": -16, // Position on the Y axis
"alpha": 100, // Opacity
"color": null, // Color (currently not in use)
"maxScale": 100, // Maximum scale (default is 100)
"scaleX": 0, // Offset along the X axis (?)
"scaleY": 16, // Offset along the Y axis (?)
"shadow": { // Shadow options
"alpha": 100, // Opacity
"color": "0x000000", // Color
"angle": 45, // Offset angle
"distance": 0, // Offset distance
"size": 6, // Size
"strength": 200 // Intensity
}
},
"healthBar": { // Health indicator
"visible": false, // false - Disable
"x": -41, // Position on the X axis
"y": -33, // Position on the Y axis
"alpha": 100, // Opacity (dynamic transparency allowed, see readme-en.txt)
"color": null, // Primary color (dynamic colors allowed, see readme-en.txt)
"lcolor": null, // Optional color (for the gradient)
"width": 80, // Width of health bar
"height": 12, // Height of health bar
"border": { // Options for substrate and border
"alpha": 30, // Opacity
"color": "0x000000", // Color
"size": 1 // Border size
},
"fill": { // Options for remaining health
"alpha": 30 // Opacity
}, //
"damage": { // Options for animation of health loss
"alpha": 80, // Opacity
"color": null, // Color
"fade": 1 // Fade time in seconds
}
},
"damageText": { // Floating damage values
"visible": true, // false - Disable
"x": 0, // Position on the X axis
"y": -67, // Position on the Y axis
"alpha": 100, // Opacity (dynamic transparency allowed, see readme-en.txt)
"color": null, // Color (dynamic colors allowed, see readme-en.txt)
"font": { // Font options
"name": "$FieldFont", // Font name
"size": 18, // Font size
"align": "center", // Text alignment (left, center, right)
"bold": false, // Normal (false) or bold (true)
"italic": false // Normal (false) or italic (true)
},
"shadow": { // Shadow options
"alpha": 100, // Opacity
"color": "0x000000", // Color
"angle": 45, // Offset angle
"distance": 0, // Offset distance
"size": 6, // Size
"strength": 200 // Intensity
},
"speed": 2, // Rising speed of displayed damage (float up speed)
"maxRange": 40, // Maximimum distance of target for which damage rises
"damageMessage": "{{dmg}}", // Text for normal damage (see description of macros in the readme-en.txt)
"blowupMessage": "* boing! *" // Text for ammo rack explosion (see description of macros in the readme-en.txt)
},
"contourIcon": { // Vehicle icon
"visible": false, // false - Disable
"x": 6, // Position on the X axis
"y": -65, // Position on the Y axis
"alpha": 100, // Opacity (dynamic transparency allowed, see readme-en.txt)
"color": null, // Color (dynamic colors allowed, see readme-en.txt)
"amount": 0 // Color intensity from 0 to 100. The default is 0 (off).
},
"clanIcon": { // Player/clan icon
"visible": false, // false - Disable
"x": 0, // Position on the X axis
"y": -67, // Position on the Y axis
"w": 16, // Width
"h": 16, // Height
"alpha": 100 // Opacity (dynamic transparency allowed, see readme-en.txt)
},
"levelIcon": { // Vehicle tier
"visible": false, // false - Disable
"x": 0, // Position on the X axis
"y": -21, // Position on the Y axis
"alpha": 100 // Opacity
},
"actionMarker": { // Markers "Help!" and "Attack!"
"visible": true, // false - Disable
"x": 0, // Position on the X axis
"y": -67, // Position on the Y axis
"alpha": 100 // Opacity
},
// Block of text fields
"textFields": [ ] // Disable text in this mode
},
// Enemy - dead - alternative mode (pressing 'Alt')
"extended": {
"vehicleIcon": { // "Type of vehicle" icon (HT / MT / LT / TD / Arty)
"visible": true, // false - Disable
"showSpeaker": false, // true - Show speaker even if visible=false
"x": 0, // Position on the X axis
"y": -16, // Position on the Y axis
"alpha": 100, // Opacity
"color": null, // Color (currently not in use)
"maxScale": 100, // Maximum scale (default is 100)
"scaleX": 0, // Offset along the X axis (?)
"scaleY": 16, // Offset along the Y axis (?)
"shadow": { // Shadow options
"alpha": 100, // Opacity
"color": "0x000000", // Color
"angle": 45, // Offset angle
"distance": 0, // Offset distance
"size": 6, // Size
"strength": 200 // Intensity
}
},
"healthBar": { // Health indicator
"visible": false, // false - Disable
"x": -41, // Position on the X axis
"y": -33, // Position on the Y axis
"alpha": 100, // Opacity (dynamic transparency allowed, see readme-en.txt)
"color": null, // Primary color (dynamic colors allowed, see readme-en.txt)
"lcolor": null, // Optional color (for the gradient)
"width": 80, // Width of health bar
"height": 12, // Height of health bar
"border": { // Options for substrate and border
"alpha": 30, // Opacity
"color": "0x000000", // Color
"size": 1 // Border size
},
"fill": { // Options for remaining health
"alpha": 30 // Opacity
}, //
"damage": { // Options for animation of health loss
"alpha": 80, // Opacity
"color": null, // Color
"fade": 1 // Fade time in seconds
}
},
"damageText": { // Floating damage values
"visible": true, // false - Disable
"x": 0, // Position on the X axis
"y": -67, // Position on the Y axis
"alpha": 100, // Opacity (dynamic transparency allowed, see readme-en.txt)
"color": null, // Color (dynamic colors allowed, see readme-en.txt)
"font": { // Font options
"name": "$FieldFont", // Font name
"size": 18, // Font size
"align": "center", // Text alignment (left, center, right)
"bold": false, // Normal (false) or bold (true)
"italic": false // Normal (false) or italic (true)
},
"shadow": { // Shadow options
"alpha": 100, // Opacity
"color": "0x000000", // Color
"angle": 45, // Offset angle
"distance": 0, // Offset distance
"size": 6, // Size
"strength": 200 // Intensity
},
"speed": 2, // Rising speed of displayed damage (float up speed)
"maxRange": 40, // Maximimum distance of target for which damage rises
"damageMessage": "{{dmg}}", // Text for normal damage (see description of macros in the readme-en.txt)
"blowupMessage": "* boing! *" // Text for ammo rack explosion (see description of macros in the readme-en.txt)
},
"contourIcon": { // Vehicle icon
"visible": false, // false - Disable
"x": 6, // Position on the X axis
"y": -65, // Position on the Y axis
"alpha": 100, // Opacity (dynamic transparency allowed, see readme-en.txt)
"color": null, // Color (dynamic colors allowed, see readme-en.txt)
"amount": 0 // Color intensity from 0 to 100. The default is 0 (off).
},
"clanIcon": { // Player/clan icon
"visible": false, // false - Disable
"x": 0, // Position on the X axis
"y": -67, // Position on the Y axis
"w": 16, // Width
"h": 16, // Height
"alpha": 100 // Opacity (dynamic transparency allowed, see readme-en.txt)
},
"levelIcon": { // Vehicle tier
"visible": false, // false - Disable
"x": 0, // Position on the X axis
"y": -21, // Position on the Y axis
"alpha": 100 // Opacity
},
"actionMarker": { // Markers "Help!" and "Attack!"
"visible": true, // false - Disable
"x": 0, // Position on the X axis
"y": -67, // Position on the Y axis
"alpha": 100 // Opacity
},
// Block of text fields
"textFields": [
// Text field with the name of the player
{
"visible": true, // false - Disable
"x": 0, // Position on the X axis
"y": -34, // Position on the Y axis
"alpha": 80, // Opacity (dynamic transparency allowed, see readme-en.txt)
"color": null, // Color (dynamic colors allowed, see readme-en.txt)
"font": { // Font options
"name": "$FieldFont", // Font name
"size": 13, // Font size
"align": "center", // Text alignment (left, center, right)
"bold": false, // Normal (false) or bold (true)
"italic": false // Normal (false) or italic (true)
},
"shadow": { // Shadow options
"alpha": 100, // Opacity
"color": "0x000000", // Color
"angle": 45, // Offset angle
"distance": 0, // Offset distance
"size": 6, // Size
"strength": 200 // Intensity
},
"format": "{{nick}}" // Text format (see description of macros in the readme-en.txt)
},
// Text field with the name of the tank
{
"visible": true, // false - Disable
"x": 0, // Position on the X axis
"y": -20, // Position on the Y axis
"alpha": 80, // Opacity (dynamic transparency allowed, see readme-en.txt)
"color": null, // Color (dynamic colors allowed, see readme-en.txt)
"font": { // Font options
"name": "$FieldFont", // Font name
"size": 13, // Font size
"align": "center", // Text alignment (left, center, right)
"bold": false, // Normal (false) or bold (true)
"italic": false // Normal (false) or italic (true)
},
"shadow": { // Shadow options
"alpha": 100, // Opacity
"color": "0x000000", // Color
"angle": 45, // Offset angle
"distance": 0, // Offset distance
"size": 6, // Size
"strength": 200 // Intensity
},
"format": "{{vehicle}}" // Text format (see description of macros in the readme-en.txt)
}
]
}
}
}
},
// COLOR SETTINGS
"colors": {
// System colors
"system": {
"ally_alive_normal": "0x96FF00", // Ally – alive
"ally_alive_blind": "0x96FF00", // Ally – alive – color blind mode
"ally_dead_normal": "0x009900", // Ally - dead
"ally_dead_blind": "0x009900", // Ally – dead – color blind mode
"ally_blowedup_normal": "0x007700", // Ally – blown-up
"ally_blowedup_blind": "0x007700", // Ally – blown-up – color blind mode
"squadman_alive_normal": "0xFFB964", // Platoon member - alive
"squadman_alive_blind": "0xFFFF00", // Platoon member – alive – color blind mode
"squadman_dead_normal": "0xCA7000", // Platoon member - dead
"squadman_dead_blind": "0xAAAA00", // Platoon member – dead – color blind mode
"squadman_blowedup_normal": "0xA45A00", // Platoon member – blown-up
"squadman_blowedup_blind": "0x888800", // Platoon member – blown-up – color blind mode
"teamKiller_alive_normal": "0x00EAFF", // Team killer - alive
"teamKiller_alive_blind": "0x00EAFF", // Team killer - alive – color blind mode
"teamKiller_dead_normal": "0x097783", // Team killer - dead
"teamKiller_dead_blind": "0x097783", // Team killer - dead – color blind mode
"teamKiller_blowedup_normal": "0x096A75", // Team killer - blown-up
"teamKiller_blowedup_blind": "0x096A75", // Team killer - blown-up – color blind mode
"enemy_alive_normal": "0xF50800", // Enemy – alive
"enemy_alive_blind": "0x8379FE", // Enemy – alive – color blind mode
"enemy_dead_normal": "0x840500", // Enemy - dead
"enemy_dead_blind": "0x47407A", // Enemy – dead – color blind mode
"enemy_blowedup_normal": "0x5A0401", // Enemy – blown-up
"enemy_blowedup_blind": "0x3B365F" // Enemy – blown-up – color blind mode
},
// Color for damage text animation
// src_dst_type
// src: ally, squadman, enemy, unknown, player
// dst: ally, squadman, allytk, enemytk, enemy
// type: hit, kill, blowup
"damage": {
"ally_ally_hit": "0x00EAFF",
"ally_ally_kill": "0x00EAFF",
"ally_ally_blowup": "0x00EAFF",
"ally_squadman_hit": "0x00EAFF",
"ally_squadman_kill": "0x00EAFF",
"ally_squadman_blowup": "0x00EAFF",
"ally_enemy_hit": "0xF50800",
"ally_enemy_kill": "0xF50800",
"ally_enemy_blowup": "0xF50800",
"ally_allytk_hit": "0x00EAFF",
"ally_allytk_kill": "0x00EAFF",
"ally_allytk_blowup": "0x00EAFF",
"ally_enemytk_hit": "0xF50800",
"ally_enemytk_kill": "0xF50800",
"ally_enemytk_blowup": "0xF50800",
"squadman_ally_hit": "0x00EAFF",
"squadman_ally_kill": "0x00EAFF",
"squadman_ally_blowup": "0x00EAFF",
"squadman_squadman_hit": "0x00EAFF",
"squadman_squadman_kill": "0x00EAFF",
"squadman_squadman_blowup": "0x00EAFF",
"squadman_enemy_hit": "0xF50800",
"squadman_enemy_kill": "0xF50800",
"squadman_enemy_blowup": "0xF50800",
"squadman_allytk_hit": "0x00EAFF",
"squadman_allytk_kill": "0x00EAFF",
"squadman_allytk_blowup": "0x00EAFF",
"squadman_enemytk_hit": "0xF50800",
"squadman_enemytk_kill": "0xF50800",
"squadman_enemytk_blowup":"0xF50800",
"enemy_ally_hit": "0x96FF00",
"enemy_ally_kill": "0x96FF00",
"enemy_ally_blowup": "0x96FF00",
"enemy_squadman_hit": "0xFFB964",
"enemy_squadman_kill": "0xFFB964",
"enemy_squadman_blowup": "0xFFB964",
"enemy_enemy_hit": "0xF50800",
"enemy_enemy_kill": "0xF50800",
"enemy_enemy_blowup": "0xF50800",
"enemy_allytk_hit": "0x96FF00",
"enemy_allytk_kill": "0x96FF00",
"enemy_allytk_blowup": "0x96FF00",
"enemy_enemytk_hit": "0xF50800",
"enemy_enemytk_kill": "0xF50800",
"enemy_enemytk_blowup": "0xF50800",
"unknown_ally_hit": "0x96FF00",
"unknown_ally_kill": "0x96FF00",
"unknown_ally_blowup": "0x96FF00",
"unknown_squadman_hit": "0xFFB964",
"unknown_squadman_kill": "0xFFB964",
"unknown_squadman_blowup":"0xFFB964",
"unknown_enemy_hit": "0xF50800",
"unknown_enemy_kill": "0xF50800",
"unknown_enemy_blowup": "0xF50800",
"unknown_allytk_hit": "0x96FF00",
"unknown_allytk_kill": "0x96FF00",
"unknown_allytk_blowup": "0x96FF00",
"unknown_enemytk_hit": "0xF50800",
"unknown_enemytk_kill": "0xF50800",
"unknown_enemytk_blowup": "0xF50800",
"player_ally_hit": "0xFFDD33",
"player_ally_kill": "0xFFDD33",
"player_ally_blowup": "0xFFDD33",
"player_squadman_hit": "0xFFDD33",
"player_squadman_kill": "0xFFDD33",
"player_squadman_blowup": "0xFFDD33",
"player_enemy_hit": "0xFFDD33",
"player_enemy_kill": "0xFFDD33",
"player_enemy_blowup": "0xFFDD33",
"player_allytk_hit": "0xFFDD33",
"player_allytk_kill": "0xFFDD33",
"player_allytk_blowup": "0xFFDD33",
"player_enemytk_hit": "0xFFDD33",
"player_enemytk_kill": "0xFFDD33",
"player_enemytk_blowup": "0xFFDD33"
},
// Damage kind
"dmg_kind": {
"attack": "0xFFAA55", // attack
"fire": "0xFF6655", // fire
"ramming": "0x998855", // ramming
"world_collision": "0x228855", // world_collision
"other": "0xCCCCCC" // other
},
// Dynamic color by vehicle type
"vtype": {
"LT": "0xA2FF9A", // Color for light tanks
"MT": "0xFFF198", // Color for medium tanks
"HT": "0xFFACAC", // Color for heavy tanks
"SPG": "0xEFAEFF", // Color for arty
"TD": "0xA0CFFF", // Color for tank destroyers
"premium": "0xFFCC66", // Color for premium tanks
"usePremiumColor": false // Enable/disable premium color usage
},
// Dynamic color by remaining absolute health
"hp": [
{ "value": 201, "color": "0xFF0000" }, // Color for health less than 201
{ "value": 401, "color": "0xDD4444" }, // Color for health less than 401
{ "value": 1001, "color": "0xFFCC22" }, // Color for health less than 1001
{ "value": 9999, "color": "0xFCFCFC" } // Color for health 1000 and more
],
// Dynamic color by remaining health percent
"hp_ratio": [
{ "value": 10, "color": "0xFF0000" }, // Color for health less than 10 prercent
{ "value": 25, "color": "0xDD4444" }, // Color for health less than 25 prercent
{ "value": 50, "color": "0xFFCC22" }, // Color for health less than 50 prercent
{ "value": 101, "color": "0xFCFCFC" } // Color for health 50 prercent and more
],
// Dynamic color by efficiency (only with xvm-stat)
"eff": [
{ "value": 600, "color": "0xFE0E00" }, // 0 - 599 - very bad
{ "value": 900, "color": "0xFE7903" }, // 600 - 899 - bad
{ "value": 1200, "color": "0xF8F400" }, // 900 - 1199 - normal
{ "value": 1500, "color": "0x60FF00" }, // 1200 - 1499 - good
{ "value": 1800, "color": "0x02C9B3" }, // 1500 - 1799 - very good
{ "value": 9999, "color": "0xD042F3" } // 1800 - * - unique
],
// Dynamic color by win percent (only with xvm-stat)
"rating": [
{ "value": 46, "color": "0xFE0E00" }, // 0 - 45 - very bad
{ "value": 48, "color": "0xFE7903" }, // 46 - 47 - bad
{ "value": 51, "color": "0xF8F400" }, // 48 - 50 - normal
{ "value": 54, "color": "0x60FF00" }, // 51 - 53 - good
{ "value": 57, "color": "0x02C9B3" }, // 54 - 56 - very good
{ "value": 101, "color": "0xD042F3" } // 57 - 100 - unique
],
// Dynamic color by kilo-battles (only with xvm-stat)
"kb": [
{ "value": 2, "color": "0xFE0E00" }, // 0 - 1
{ "value": 5, "color": "0xFE7903" }, // 2 - 4
{ "value": 9, "color": "0xF8F400" }, // 5 - 8
{ "value": 14, "color": "0x60FF00" }, // 9 - 13
{ "value": 20, "color": "0x02C9B3" }, // 14 - 19
{ "value": 999, "color": "0xD042F3" } // 20 - *
],
// Dynamic color by battles on current tank (only with xvm-stat)
"t_battles": [
{ "value": 100, "color": "0xFE0E00" }, // 0 - 99
{ "value": 250, "color": "0xFE7903" }, // 100 - 249
{ "value": 500, "color": "0xF8F400" }, // 250 - 499
{ "value": 1000, "color": "0x60FF00" }, // 500 - 999
{ "value": 1800, "color": "0x02C9B3" }, // 1000 - 1799
{ "value": 99999, "color": "0xD042F3" } // 1800 - *
],
"tdb": [
{ "value": 1, "color": "0xFCFCFC" },
{ "value": 500, "color": "0xFE0E00" },
{ "value": 1000, "color": "0xF8F400" },
{ "value": 2000, "color": "0x60FF00" }
],
"tdv": [
{ "value": 0.01, "color": "0xFCFCFC" },
{ "value": 0.6, "color": "0xFE0E00" },
{ "value": 0.8, "color": "0xFE7903" },
{ "value": 1.0, "color": "0xF8F400" },
{ "value": 1.3, "color": "0x60FF00" },
{ "value": 2.0, "color": "0x02C9B3" },
{ "value": 15, "color": "0xD042F3" }
],
"tfb": [
{ "value": 0.01, "color": "0xFCFCFC" },
{ "value": 0.6, "color": "0xFE0E00" },
{ "value": 0.8, "color": "0xFE7903" },
{ "value": 1.0, "color": "0xF8F400" },
{ "value": 1.3, "color": "0x60FF00" },
{ "value": 2.0, "color": "0x02C9B3" },
{ "value": 15, "color": "0xD042F3" }
],
"tsb": [
{ "value": 0.01, "color": "0xFCFCFC" },
{ "value": 0.6, "color": "0xFE0E00" },
{ "value": 0.8, "color": "0xFE7903" },
{ "value": 1.0, "color": "0xF8F400" },
{ "value": 1.3, "color": "0x60FF00" },
{ "value": 2.0, "color": "0x02C9B3" },
{ "value": 15, "color": "0xD042F3" }
],
"e": [
{ "value": 0.01, "color": "0xFCFCFC" },
{ "value": 2, "color": "0xFE0E00" },
{ "value": 3, "color": "0xFE7903" },
{ "value": 5, "color": "0xF8F400" },
{ "value": 7, "color": "0x60FF00" },
{ "value": 9, "color": "0x02C9B3" },
{ "value": 10, "color": "0xD042F3" }
]
},
// OPTIONS FOR DYNAMIC TRANSPARENCY
"alpha": {
// Dynamic transparency by remaining health
"hp": [
{ "value": 200, "alpha": 100 },
{ "value": 400, "alpha": 80 },
{ "value": 1000, "alpha": 60 },
{ "value": 9999, "alpha": 40 }
],
// Dynamic transparency by percentage of remaining health
"hp_ratio": [
{ "value": 10, "alpha": 100 },
{ "value": 25, "alpha": 80 },
{ "value": 50, "alpha": 60 },
{ "value": 101, "alpha": 40 }
],
// Dynamic transparency by effectiveness (only with xvm-stat)
"eff": [
{ "value": 900, "alpha": 100 },
{ "value": 1200, "alpha": 100 },
{ "value": 9999, "alpha": 100 }
],
// Dynamic transparency by victory percentage (only with xvm-stat)
"rating": [
{ "value": 49, "alpha": 100 },
{ "value": 53, "alpha": 100 },
{ "value": 101, "alpha": 100 }
],
// Dynamic transparency by the number of thousands of battles ("kilo-battles") (only with xvm-stat)
"kb": [
{ "value": 2, "alpha": 100 },
{ "value": 10, "alpha": 100 },
{ "value": 999, "alpha": 100 }
]
},
// Text substitutions
"texts": {
// Text for {{vtype}} macro
"vtype": {
"LT": "LT", // Text for light tanks
"MT": "MT", // Text for medium tanks
"HT": "HT", // Text for heavy tanks
"SPG": "SPG", // Text for arty
"TD": "TD" // Text for tank destroyers
}
},
// ICON SETS
"iconset": {
// Folder containing the icon set for Battle Loading Screen
"battleLoading": "../maps/icons/vehicle/contour",
// Folder containing the icon set for Battle Statistics Form (pressing 'Tab')
"statisticForm": "../maps/icons/vehicle/contour",
// Folder containing the icon set for the Players Panels
"playersPanel": "../maps/icons/vehicle/contour",
// Folder containing the icon set for the Over-target markers
"vehicleMarker": "../maps/icons/vehicle/contour"
},
// Vehicle names mapping. null value for standard name.
"vehicleNames": {
"china_Ch01_Type59": null,
"china_Ch02_Type62": null,
"china_Ch03_WZ_111": null,
"china_Ch04_T34_1": null,
"china_Ch05_T34_2": null,
"china_Ch06_Renault_NC31": null,
"china_Ch07_Vickers_MkE_Type_BT26": null,
"china_Ch08_Type97_Chi_Ha": null,
"china_Ch09_M5": null,
"china_Ch10_IS2": null,
"china_Ch11_110": null,
"china_Ch12_111_1_2_3": null,
"china_Ch13_111_4_5": null,
"china_Ch15_59_16": null,
"china_Ch16_WZ_131": null,
"china_Ch17_WZ131_1_WZ132": null,
"china_Ch18_WZ_120": null,
"china_Ch19_121": null,
"china_Ch20_Type58": null,
"china_Ch21_T34": null,
"france_AMX38": null,
"france_AMX40": null,
"france_AMX50_Foch": null,
"france_AMX_105AM": null,
"france_AMX_12t": null,
"france_AMX_13F3AM": null,
"france_AMX_13_75": null,
"france_AMX_13_90": null,
"france_AMX_50Fosh_155": null,
"france_AMX_50_100": null,
"france_AMX_50_120": null,
"france_AMX_AC_Mle1946": null,
"france_AMX_AC_Mle1948": null,
"france_AMX_M4_1945": null,
"france_ARL_44": null,
"france_ARL_V39": null,
"france_B1": null,
"france_BDR_G1B": null,
"france_Bat_Chatillon155": null,
"france_Bat_Chatillon25t": null,
"france_D1": null,
"france_D2": null,
"france_ELC_AMX": null,
"france_F10_AMX_50B": null,
"france_FCM_36Pak40": null,
"france_FCM_50t": null,
"france_Hotchkiss_H35": null,
"france_Lorraine155_50": null,
"france_Lorraine155_51": null,
"france_Lorraine39_L_AM": null,
"france_Lorraine40t": null,
"france_RenaultBS": null,
"france_RenaultFT": null,
"france_RenaultFT_AC": null,
"france_RenaultUE57": null,
"france_S_35CA": null,
"france_Somua_Sau_40": null,
"france__105_leFH18B2": null,
"germany_B_1bis_captured": null,
"germany_Bison_I": null,
"germany_DickerMax": null,
"germany_E50_Ausf_M": null,
"germany_E_100": null,
"germany_E_50": null,
"germany_E_75": null,
"germany_Ferdinand": null,
"germany_G20_Marder_II": null,
"germany_G_E": null,
"germany_G_Panther": null,
"germany_G_Tiger": null,
"germany_Grille": null,
"germany_H39_captured": null,
"germany_Hetzer": null,
"germany_Hummel": null,
"germany_JagdPanther": null,
"germany_JagdPantherII": null,
"germany_JagdPzIV": null,
"germany_JagdPz_E100": null,
"germany_JagdTiger": null,
"germany_JagdTiger_SdKfz_185": null,
"germany_Lowe": null,
"germany_Ltraktor": null,
"germany_Maus": null,
"germany_Panther_II": null,
"germany_Panther_M10": null,
"germany_PanzerJager_I": null,
"germany_Pz35t": null,
"germany_Pz38_NA": null,
"germany_Pz38t": null,
"germany_PzII": null,
"germany_PzIII": null,
"germany_PzIII_A": null,
"germany_PzIII_IV": null,
"germany_PzII_J": null,
"germany_PzII_Luchs": null,
"germany_PzIV": null,
"germany_PzIV_Hydro": null,
"germany_PzIV_schmalturm": null,
"germany_PzV": null,
"germany_PzVI": null,
"germany_PzVIB_Tiger_II": null,
"germany_PzVI_Tiger_P": null,
"germany_PzV_PzIV": null,
"germany_PzV_PzIV_ausf_Alfa": null,
"germany_S35_captured": null,
"germany_StuGIII": null,
"germany_Sturmpanzer_II": null,
"germany_T_15": null,
"germany_T_25": null,
"germany_VK1602": null,
"germany_VK2801": null,
"germany_VK3001H": null,
"germany_VK3001P": null,
"germany_VK3002DB": null,
"germany_VK3601H": null,
"germany_VK4502A": null,
"germany_VK4502P": null,
"germany_Wespe": null,
"uk_GB01_Medium_Mark_I": null,
"uk_GB03_Cruiser_Mk_I": null,
"uk_GB04_Valentine": null,
"uk_GB05_Vickers_Medium_Mk_II": null,
"uk_GB06_Vickers_Medium_Mk_III": null,
"uk_GB07_Matilda": null,
"uk_GB08_Churchill_I": null,
"uk_GB09_Churchill_VII": null,
"uk_GB10_Black_Prince": null,
"uk_GB11_Caernarvon": null,
"uk_GB12_Conqueror": null,
"uk_GB13_FV215b": null,
"uk_GB20_Crusader": null,
"uk_GB21_Cromwell": null,
"uk_GB22_Comet": null,
"uk_GB23_Centurion": null,
"uk_GB24_Centurion_Mk3": null,
"uk_GB58_Cruiser_Mk_III": null,
"uk_GB59_Cruiser_Mk_IV": null,
"uk_GB60_Covenanter": null,
"uk_GB63_TOG_II": null,
"uk_GB68_Matilda_Black_Prince": null,
"uk_GB69_Cruiser_Mk_II": null,
"uk_GB70_FV4202_105": null,
"uk_GB71_AT_15A": null,
"usa_A74_T1_E6": null,
"usa_M103": null,
"usa_M10_Wolverine": null,
"usa_M12": null,
"usa_M18_Hellcat": null,
"usa_M22_Locust": null,
"usa_M24_Chaffee": null,
"usa_M2_lt": null,
"usa_M2_med": null,
"usa_M36_Slagger": null,
"usa_M37": null,
"usa_M3_Grant": null,
"usa_M3_Stuart": null,
"usa_M40M43": null,
"usa_M41": null,
"usa_M46_Patton": null,
"usa_M48A1": null,
"usa_M4A2E4": null,
"usa_M4A3E8_Sherman": null,
"usa_M4_Sherman": null,
"usa_M5_Stuart": null,
"usa_M6": null,
"usa_M6A2E1": null,
"usa_M7_Priest": null,
"usa_M7_med": null,
"usa_M8A1": null,
"usa_MTLS_1G14": null,
"usa_Pershing": null,
"usa_Ram_II": null,
"usa_Sherman_Jumbo": null,
"usa_T110": null,
"usa_T110E3": null,
"usa_T110E4": null,
"usa_T14": null,
"usa_T18": null,
"usa_T1_Cunningham": null,
"usa_T1_E6": null,
"usa_T1_hvy": null,
"usa_T20": null,
"usa_T21": null,
"usa_T25_2": null,
"usa_T25_AT": null,
"usa_T26_E4_SuperPershing": null,
"usa_T28": null,
"usa_T28_Prototype": null,
"usa_T29": null,
"usa_T2_lt": null,
"usa_T2_med": null,
"usa_T30": null,
"usa_T32": null,
"usa_T34_hvy": null,
"usa_T40": null,
"usa_T49": null,
"usa_T54E1": null,
"usa_T57": null,
"usa_T57_58": null,
"usa_T69": null,
"usa_T71": null,
"usa_T82": null,
"usa_T92": null,
"usa_T95": null,
"ussr_AT_1": null,
"ussr_A_20": null,
"ussr_A_32": null,
"ussr_BT_2": null,
"ussr_BT_7": null,
"ussr_BT_SV": null,
"ussr_Churchill_LL": null,
"ussr_GAZ_74b": null,
"ussr_IS8": null,
"ussr_IS": null,
"ussr_ISU_152": null,
"ussr_IS_3": null,
"ussr_IS_4": null,
"ussr_IS_7": null,
"ussr_KV1": null,
"ussr_KV2": null,
"ussr_KV4": null,
"ussr_KV_13": null,
"ussr_KV_1s": null,
"ussr_KV_220": null,
"ussr_KV_220_action": null,
"ussr_KV_3": null,
"ussr_KV_5": null,
"ussr_M3_Stuart_LL": null,
"ussr_MS_1": null,
"ussr_Matilda_II_LL": null,
"ussr_Object252": null,
"ussr_Object263": null,
"ussr_Object268": null,
"ussr_Object_212": null,
"ussr_Object_261": null,
"ussr_Object_704": null,
"ussr_ST_I": null,
"ussr_SU100M1": null,
"ussr_SU100Y": null,
"ussr_SU122_44": null,
"ussr_SU122_54": null,
"ussr_SU_100": null,
"ussr_SU_101": null,
"ussr_SU_14": null,
"ussr_SU_152": null,
"ussr_SU_18": null,
"ussr_SU_26": null,
"ussr_SU_5": null,
"ussr_SU_76": null,
"ussr_SU_85": null,
"ussr_SU_85I": null,
"ussr_SU_8": null,
"ussr_S_51": null,
"ussr_T150": null,
"ussr_T62A": null,
"ussr_T_127": null,
"ussr_T_26": null,
"ussr_T_28": null,
"ussr_T_34": null,
"ussr_T_34_85": null,
"ussr_T_43": null,
"ussr_T_44": null,
"ussr_T_46": null,
"ussr_T_50": null,
"ussr_T_50_2": null,
"ussr_T_54": null,
"ussr_Tetrarch_LL": null,
"ussr_Valentine_LL": null
}
}



.gif "sm_B-) :-)")