Du verwendest einen veralteten Browser. Es ist möglich, dass diese oder andere Websites nicht korrekt angezeigt werden.
Du solltest ein Upgrade durchführen oder einen alternativen Browser verwenden.
Du solltest ein Upgrade durchführen oder einen alternativen Browser verwenden.
[Worklog] (An)other TJ07 Build
- Ersteller TechMax
- Erstellt am
Sgt.Speirs
Komplett-PC-Aufrüster(in)
Sitzen die drei 92mm-Lüfter oben auf nem Radiator oder hab ich das falsch verstanden?Ja kommt einer rein. 3x 92mm Lüfter werden reinblasen ist nicht viel muss aber reichen.
Ich bin auf jeden Fall gespannt auf den AGB. Der kommt dann vermutlich in die Front.
TE
TE
TechMax
Komplett-PC-Aufrüster(in)
Bin gespannt was ich hier hübsches zu sehen bekomme
Hast n Abo mehr")
Thx
Sitzen die drei 92mm-Lüfter oben auf nem Radiator oder hab ich das falsch verstanden?
Ich bin auf jeden Fall gespannt auf den AGB. Der kommt dann vermutlich in die Front.
Nein 2 Vorne im AGB und einer hinten. Richtig.


TE
TE
TechMax
Komplett-PC-Aufrüster(in)
Da (fast) alle Teile nun fertig gezeichnet sind gehts nun ab in die Produktion.
Die Midplate muss ich aber noch zeichnen.
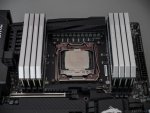
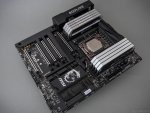
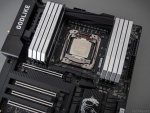
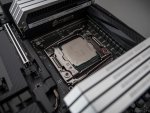
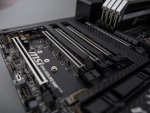
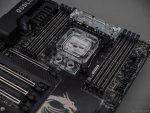
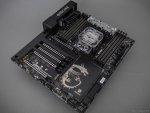
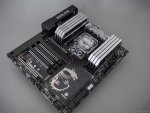
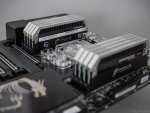
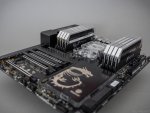
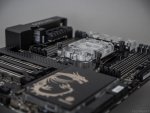
Jetzt hatte ich endlich mal Zeit die Hardware abzulichten deshalb gibts hier mal ein paar leckere Bilder für euch!
MSI Godlike Gaming Carbon + 5960X + 64GB Dominator und als schmankerl noch nen VRM und Chipsatzblock.
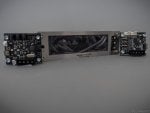
Die Aquaero mit Poweradjust und Farbwerk hab ich auch schnell abgelichtet.
Die Midplate muss ich aber noch zeichnen.
Jetzt hatte ich endlich mal Zeit die Hardware abzulichten deshalb gibts hier mal ein paar leckere Bilder für euch!
MSI Godlike Gaming Carbon + 5960X + 64GB Dominator und als schmankerl noch nen VRM und Chipsatzblock.
Die Aquaero mit Poweradjust und Farbwerk hab ich auch schnell abgelichtet.
Anhänge
-
 P1060682.jpg2 MB · Aufrufe: 111
 -
 P1060677.jpg2,2 MB · Aufrufe: 117
 -
 P1060672.jpg2 MB · Aufrufe: 114
 -
 P1060670.jpg2 MB · Aufrufe: 112
 -
 P1060683.jpg2,2 MB · Aufrufe: 101
 -
 P1060684.jpg2,1 MB · Aufrufe: 106
 -
 P1060685.jpg2,1 MB · Aufrufe: 103
 -
 P1060688.jpg2,1 MB · Aufrufe: 111
 -
 P1060695.jpg2,1 MB · Aufrufe: 120
 -
 P1060694.jpg2,1 MB · Aufrufe: 115
 -
 P1060693.jpg2 MB · Aufrufe: 120
 -
 P1060690.jpg2 MB · Aufrufe: 136
 -
 P1060713.jpg2,1 MB · Aufrufe: 138
 -
 P1060709.jpg2 MB · Aufrufe: 132
 -
 P1060707.jpg2,1 MB · Aufrufe: 118
 -
 P1060703.jpg2 MB · Aufrufe: 95

TE
TE
TechMax
Komplett-PC-Aufrüster(in)
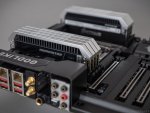
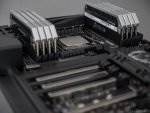
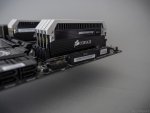
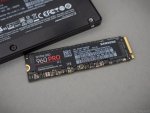
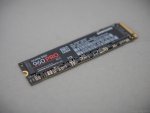
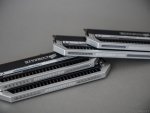
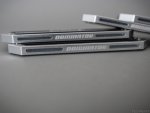
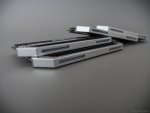
Noch ein kleines Update Speicher wäre dann auch mal da! Overkill?
Dann wäre jetzt alles an Hardware da. Jetzt heißt es nur noch auf die Fräs Teile warten.
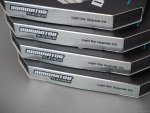
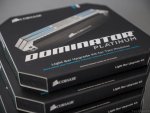
Ich konnte nicht widerstehen und musste die Dominator noch mit dem Light Bar Upgrade Kit versehen.
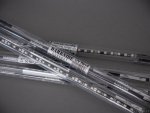
Ebenso sind auch ein "paar" UV Darkside LED Strips gekommen.
Dann wäre jetzt alles an Hardware da. Jetzt heißt es nur noch auf die Fräs Teile warten.
Ich konnte nicht widerstehen und musste die Dominator noch mit dem Light Bar Upgrade Kit versehen.
Ebenso sind auch ein "paar" UV Darkside LED Strips gekommen.
Anhänge
-
 P1060805.jpg2,1 MB · Aufrufe: 134
 -
 P1060806.jpg2 MB · Aufrufe: 130
 -
 P1060807.jpg1,9 MB · Aufrufe: 104
 -
 P1060813.jpg2,1 MB · Aufrufe: 156
 -
 P1060812.jpg2 MB · Aufrufe: 160
 -
 P1060811.jpg1,9 MB · Aufrufe: 123
 -
 P1060814.jpg1,9 MB · Aufrufe: 115
 -
 P1060815.jpg2 MB · Aufrufe: 106
 -
 P1060817.jpg2 MB · Aufrufe: 126
TE
TE
TechMax
Komplett-PC-Aufrüster(in)
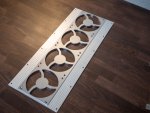
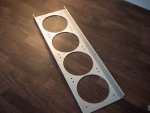
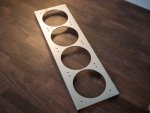
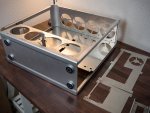
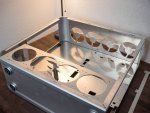
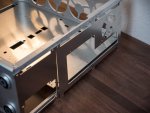
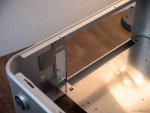
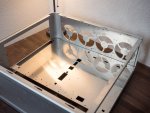
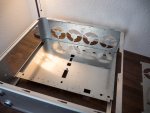
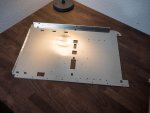
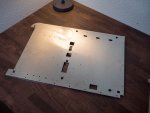
Finally!!! Meine Alu Teile von Gosumodz sind eingetroffen. Die Acryl Teile sollten auch die Tage kommen.
Ich habe fast alle Teile neu gezeichnet und Fräsen lassen.
Was jetzt ansteht ist verbohren und den Rahmen nochmal ein wenig anpassen.
Danach kommt alles zum Pulver Mann!
Und nun ein Wenig Alu Porn
Hab mal noch alles zusammengestellt das man sieht was dabei rauskommt
Ich habe fast alle Teile neu gezeichnet und Fräsen lassen.
Was jetzt ansteht ist verbohren und den Rahmen nochmal ein wenig anpassen.
Danach kommt alles zum Pulver Mann!
Und nun ein Wenig Alu Porn
Hab mal noch alles zusammengestellt das man sieht was dabei rauskommt
Anhänge
-
 P1070115.jpg1,3 MB · Aufrufe: 135
 -
 P1070114.jpg1,4 MB · Aufrufe: 144
 -
 P1070113.jpg1,4 MB · Aufrufe: 131
 -
 P1070111.jpg1,4 MB · Aufrufe: 140
 -
 P1070110.jpg1,4 MB · Aufrufe: 131
 -
 P1070109.jpg1,5 MB · Aufrufe: 136
 -
 P1070107.jpg1,7 MB · Aufrufe: 129
 -
 P1070104.jpg1,3 MB · Aufrufe: 139
 -
 P1070132.jpg1,2 MB · Aufrufe: 146
 -
 P1070130.jpg1 MB · Aufrufe: 163
 -
 P1070127.jpg1,2 MB · Aufrufe: 151
 -
 P1070125.jpg1,1 MB · Aufrufe: 142
 -
 P1070124.jpg1,2 MB · Aufrufe: 139
 -
 P1070123.jpg1,3 MB · Aufrufe: 134
 -
 P1070122.jpg1,5 MB · Aufrufe: 145
 -
 P1070121.jpg1,4 MB · Aufrufe: 152
 -
 P1070119.jpg1,1 MB · Aufrufe: 139
 -
 P1070118.jpg1,1 MB · Aufrufe: 133

TE
TE
TechMax
Komplett-PC-Aufrüster(in)
@Buddy nein ist schon richtig so, hab es als inverted ATX gebaut. ")
Edit. jetzt seh ichs ich habs aufm Foto falsch herum hingelegt.
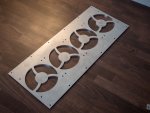
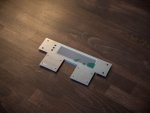
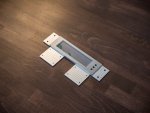
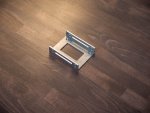
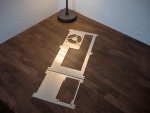
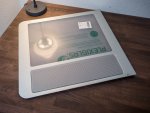
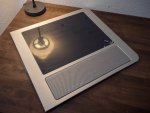
Ich präsentiere, geile Acryl Teile!
Einmal Midplate und einmal Front Reservoir.
Warum ich nicht einfach Kanäle bis nach vorne in der Midplate gemacht habe seht ihr auch noch.
Eventuell poliere ich noch ein wenig die Frässpuren weg, ORinge muss ich noch machen und die Gewinde auch noch schneiden.
Natürlich alles gefräst by Gosumodz!


Edit. jetzt seh ichs ich habs aufm Foto falsch herum hingelegt.
Ich präsentiere, geile Acryl Teile!
Einmal Midplate und einmal Front Reservoir.
Warum ich nicht einfach Kanäle bis nach vorne in der Midplate gemacht habe seht ihr auch noch.
Eventuell poliere ich noch ein wenig die Frässpuren weg, ORinge muss ich noch machen und die Gewinde auch noch schneiden.
Natürlich alles gefräst by Gosumodz!
Zuletzt bearbeitet:

Ähnliche Themen
- Antworten
- 8
- Aufrufe
- 2K
- Antworten
- 26
- Aufrufe
- 5K
- Antworten
- 21
- Aufrufe
- 4K
- Antworten
- 77
- Aufrufe
- 17K
- Antworten
- 4
- Aufrufe
- 874