Einen wunder schönen guten Tag liebe Community.
Seit vielen Jahen modde ich Gehäuse für Firmen und auch für Austellungen und Messen.
Nun habe ich mir gedacht, bau ich mal etwas für "mich".
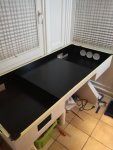
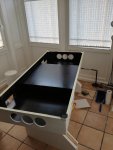
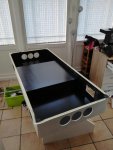
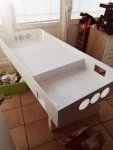
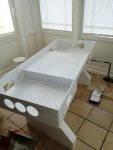
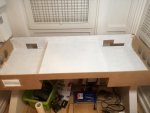
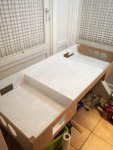
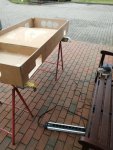
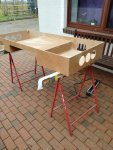
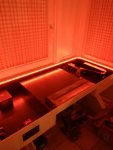
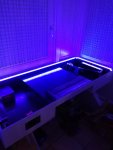
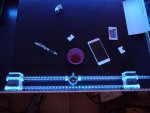
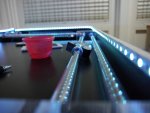
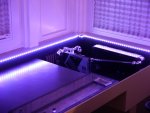
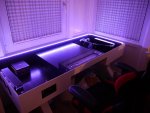
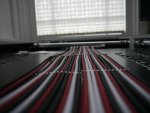
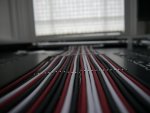
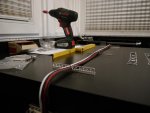
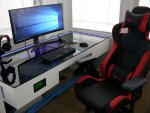
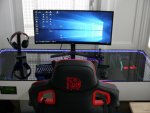
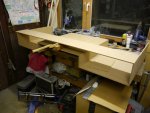
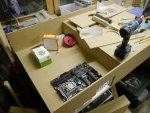
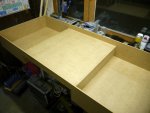
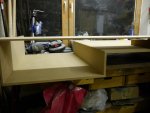
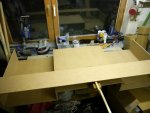
Nach einer eigentlich kurzen Planung und nur einer kleinen Skize, habe ich auch gleich mit dem bau meines Table PC´s angefangen.
Vorab muss ich sagen das er schon zu fast 80% fertig ist, da ich beim Bau/Umbau keinen PC angschlossen hatte, um Bilder oder ein Log zu führen.
Dies möchte ich nun nachholen.
Nach und nach werde ich Bilder hochladen und bisschen was zu schreiben.
Ich hoffe euch gefällt es
Und wie immer muss ich mich bei meinen Supporten herzlichst für die sehr gute Unterstützung bedanken.
Thermaltake Germany
ASRock
Klevv
Zotac
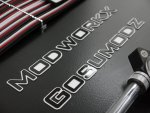
Gosumodz
Modworkx
ohne euch wäre das nichts geworden.
https://abload.de/img/tischvvric.jpg
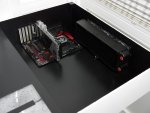
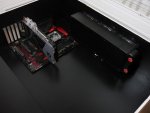
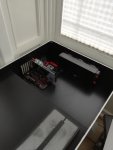
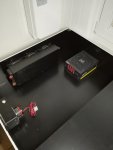
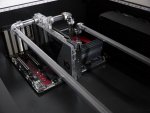
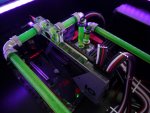
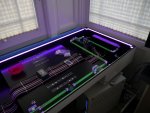
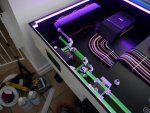
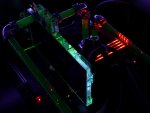
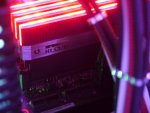
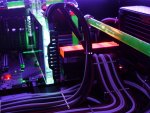
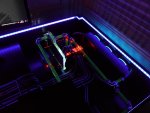
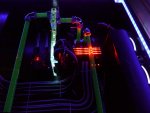
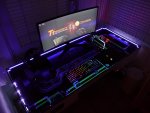
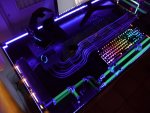
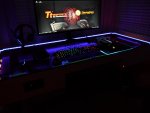
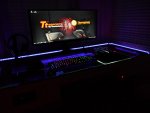
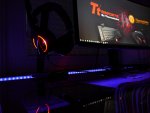
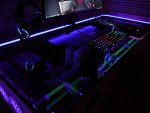
Hardware:
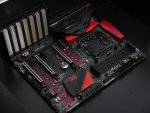
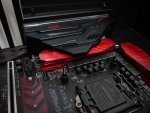
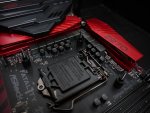
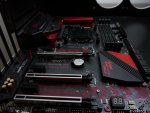
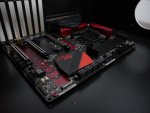
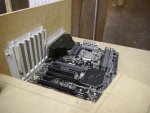
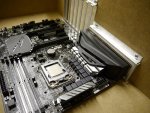
ASRock Fatal1ty Z270 Gaming K6
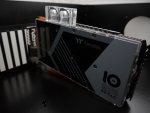
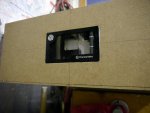
Zotac GeForce GTX 1080 ArcticStorm Thermaltake 10 Year Anniversary Edition
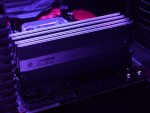
Klevv Cras Red DIMM Kit 32GB
Klevv Neo N600 SSD 480GB
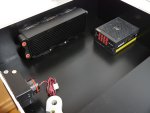
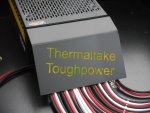
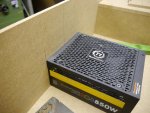
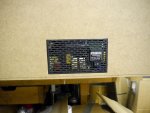
Thermaltake Toughpower DPS G RGB 850W Titanium
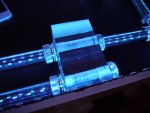
Thermaltake Riing 12 RGB Radiator Fan TT Premium Edition
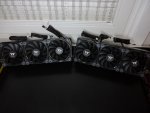
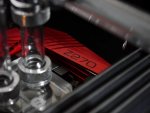
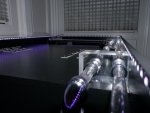
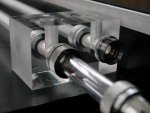
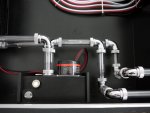
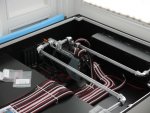
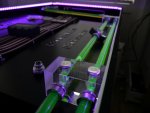
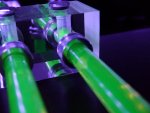
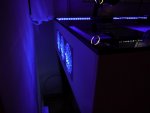
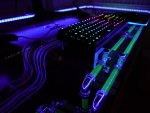
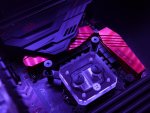
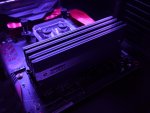
Wasserkühlung:
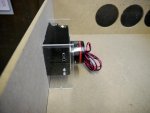
Thermaltake Pacific PR2U Pump/Reservoir Combo
Thermaltake Pacific Flow Indicator One
Thermaltake Pacific W3 CPU Water Block
Thermaltake Pacific G1/4 PETG Tube 90-Degree Dual Compression 16mm OD – Chrome
Thermaltake Pacific G1/4 PETG Tube 16mm (5/8”) OD Compression – Chrome
Thermaltake Pacific RL360 Radiator
Thermaltake V-Tubler PETG Tube 12mm OD 10mm ID 500mm 4 Pack
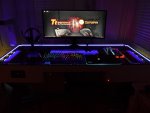
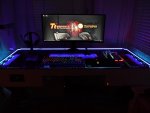
Eingabegeräte/Stuhl:
Ttesports CHALLENGER Prime Carbon Edition
Ttesports CRONOS Riing RGB 7.1
Ttesports GT Fit Red/Black Gaming Chair
Ttesports Draconem RGB Gaming Mouse Pad
Seit vielen Jahen modde ich Gehäuse für Firmen und auch für Austellungen und Messen.
Nun habe ich mir gedacht, bau ich mal etwas für "mich".
Nach einer eigentlich kurzen Planung und nur einer kleinen Skize, habe ich auch gleich mit dem bau meines Table PC´s angefangen.
Vorab muss ich sagen das er schon zu fast 80% fertig ist, da ich beim Bau/Umbau keinen PC angschlossen hatte, um Bilder oder ein Log zu führen.
Dies möchte ich nun nachholen.
Nach und nach werde ich Bilder hochladen und bisschen was zu schreiben.
Ich hoffe euch gefällt es
Und wie immer muss ich mich bei meinen Supporten herzlichst für die sehr gute Unterstützung bedanken.
Thermaltake Germany
ASRock
Klevv
Zotac
Gosumodz
Modworkx
ohne euch wäre das nichts geworden.
https://abload.de/img/tischvvric.jpg
Hardware:
ASRock Fatal1ty Z270 Gaming K6
Zotac GeForce GTX 1080 ArcticStorm Thermaltake 10 Year Anniversary Edition
Klevv Cras Red DIMM Kit 32GB
Klevv Neo N600 SSD 480GB
Thermaltake Toughpower DPS G RGB 850W Titanium
Thermaltake Riing 12 RGB Radiator Fan TT Premium Edition
Wasserkühlung:
Thermaltake Pacific PR2U Pump/Reservoir Combo
Thermaltake Pacific Flow Indicator One
Thermaltake Pacific W3 CPU Water Block
Thermaltake Pacific G1/4 PETG Tube 90-Degree Dual Compression 16mm OD – Chrome
Thermaltake Pacific G1/4 PETG Tube 16mm (5/8”) OD Compression – Chrome
Thermaltake Pacific RL360 Radiator
Thermaltake V-Tubler PETG Tube 12mm OD 10mm ID 500mm 4 Pack
Eingabegeräte/Stuhl:
Ttesports CHALLENGER Prime Carbon Edition
Ttesports CRONOS Riing RGB 7.1
Ttesports GT Fit Red/Black Gaming Chair
Ttesports Draconem RGB Gaming Mouse Pad
Zuletzt bearbeitet:

")